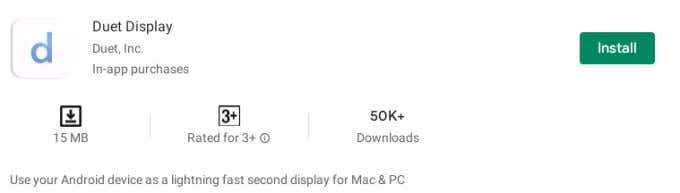
ChromeOS doesn’t have a built-in tool that lets you do this, so you’ll need third-party solutions. We tested a handful of (free and paid) tools but only found one reliable product—Duet Display. Before anything, we should mention that Duet Display is a paid app (costs $9.99). You’ll only need to purchase the Android app on your Chromebook (from the Google Play Store). The Mac and Windows clients are free—as long as you’re a paid user. It also works wirelessly so you don’t need any cable. However, your devices must be on the same Wi-Fi network for the app to work.
Set Up Duet Display on Chromebook
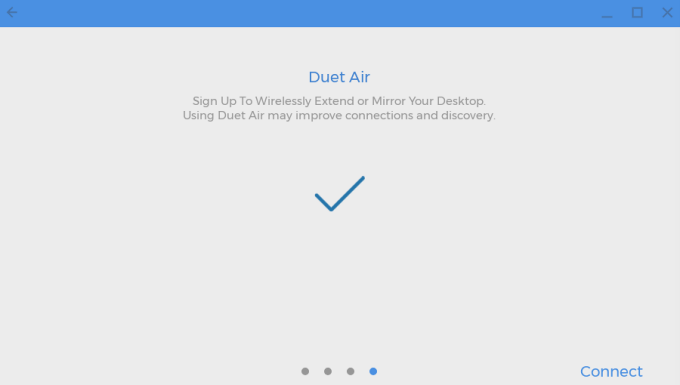
Launch the Play Store, search for Duet Display, and click Install to download the app on your Chromebook. Open Duet Display, create an account (verify the account in your email, too) and click Connect to link your Mac or Windows PC’s display to your Chromebook. The app is now ready to receive visual signals from other devices connected to your Duet Air account. The next step is to set up Duet Display on your Mac or Windows computer.
Set Up Duet Display on Mac
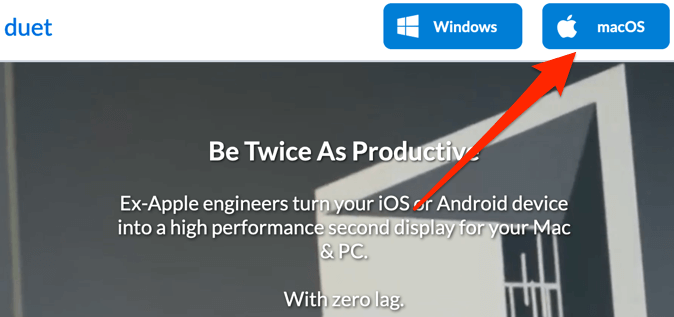
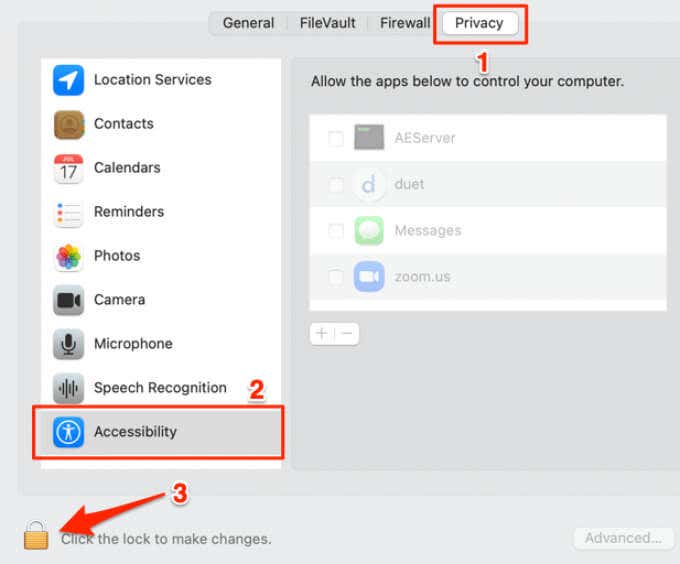
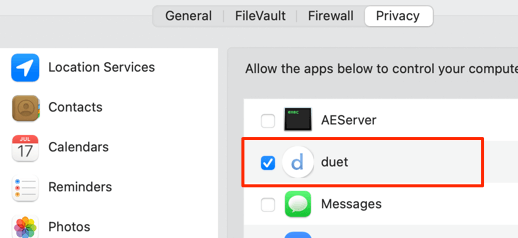
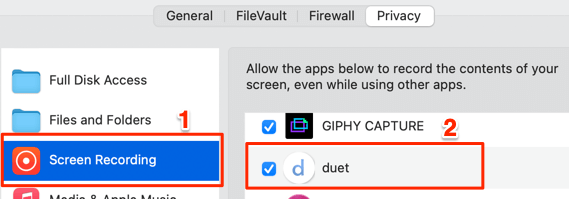
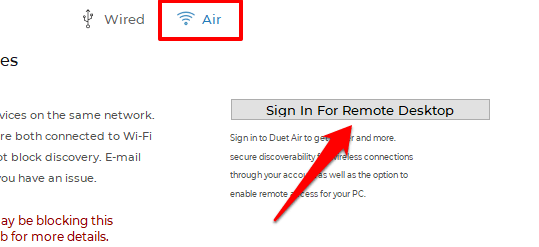
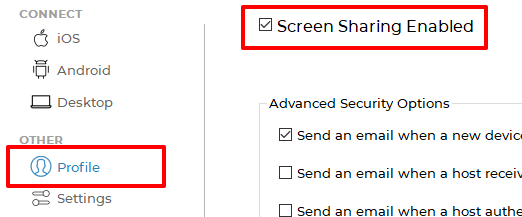
Visit the Duet Display website and click the macOS buttons to download the app client. Install the app on your device and proceed to the next step to use your Chromebook as a second monitor. If your Mac runs macOS Catalina (10.15) or later, you’ll need to grant the Duet Display “Accessibility” and Screen access. Go to System Preferences > Security & Privacy > Privacy > Accessibility and click the lock icon at the window’s bottom-left corner. Check duet to grant the app access to control your Mac. Next, for screen recording access; select Screen Recording on the sidebar and check duet. Although you can use the Dual Display’s Mac client without an account, signing into your Duet Account allows for a secured and faster connection with your Chromebook. Therefore, we recommend signing in to your Duet Air account; launching the app and clicking Sign In For Remote Desktop. There’s one last thing you need to do: enable screen sharing within the Duet app. Click Profile on the sidebar and check Screen Sharing Enabled. You can now proceed to use the app to project or extend your Mac’s display to your Chromebook.
Use Chromebook as Second Monitor on Mac
Make sure Duet Display has the necessary permissions to work correctly. Likewise, ensure you connect your devices to the same Wi-Fi network.
- Launch the Duet app on your Chromebook.
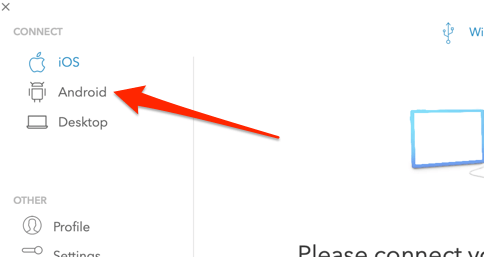
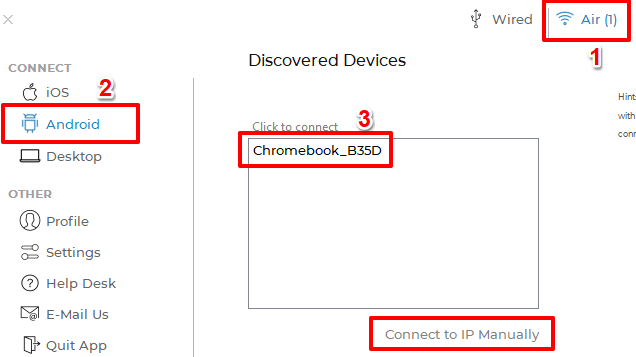
- Open the app on your Mac and go to the Android tab. The app should automatically detect your Chromebook or other “Duet Air” devices connected to your Wi-Fi network.
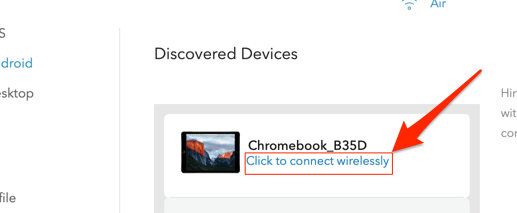
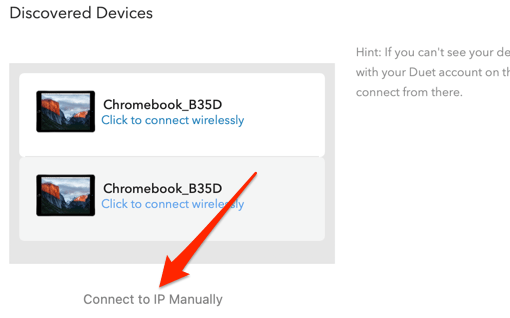
- When your Chromebook shows up in the “Discovered Devices” section, tap Click to connect wirelessly. If the app isn’t detecting your Chromebook automatically, select Connect to IP Manually, enter your Chromebook’s IP address and select Connect. You’ll find your Chromebook’s IP address in Settings > Network > Connected network > IP Address.
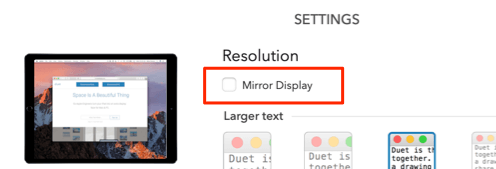
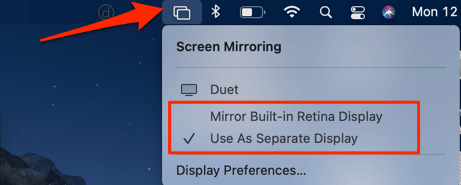
- Duet lets you mirror and extend your Mac’s display. If your Mac has a Touch Bar, you can easily toggle between both the “Mirror Displays” or “Extend Desktop” modes. To switch display mode on non-Touch Bar Macs, go to Duet’s settings, select Adjust Settings and check Mirror Display. Another way to switch display modes is to click the mirroring icon on the Mac menu bar and select Mirror Built-in Retina Display. To move an app or window to the Chromebook’s display, drag the app to the right edge of your Mac’s screen. The app window will appear on your Chromebook from the left edge of the display. If you wish to modify or alternate the screen positions, go to System Preferences > Displays > Arrangement and drag the display (blue rectangle) to a different position. Interestingly, you can also move the menu bar only; drag the white rectangle at the top of the display to the second screen. Whether you’re mirroring or extending your display, Duet is smart enough to detect your Mac or PC’s keyboard and trackpad. You can also use the Chromebook’s keyboard or trackpad if you wish.
Set Up Duet Display on Windows
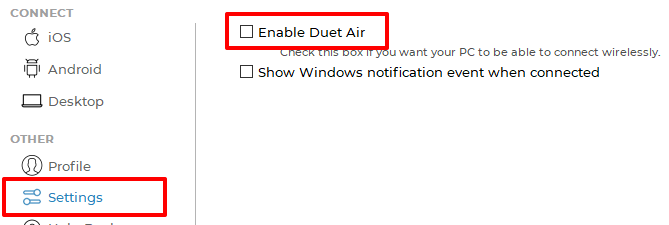
Visit the Duet Display website and download the Windows setup client. Install the app and restart your computer. Connect your PC to the same Wi-Fi network as the Chromebook and launch Duet. Go to the Air tab and click Sign In For Remote Access to connect your Dual Air account. Next, go to the Profile tab and check Screen Sharing Enabled. Finally, go to the Settings tab and check Enable Duet Air. Everything’s now in order to use your Chromebook as a second display for your PC.
Use Chromebook As Second Monitor on Windows
Note: Although Duet supports Windows, the app worked better and smoother on Mac. The app occasionally crashed on our test Windows PC, particularly after connecting to a Chromebook. Sometimes, it wouldn’t open unless we rebooted our PC. From our research, a couple of other Windows users were also unable to use the app smoothly on their devices, but a few others got it working without issues. This may be due to varying hardware configurations. Or perhaps, a bug in the Windows client. Give the app a try on your Windows PC and let us know your experience. If you configured the app correctly, the Duet app on your Windows should automatically detect your Chromebook immediately. Otherwise, close and reopen the app, or restart your computer. In the Air tab, select Android on the sidebar and click your Chromebook. If you still can’t find your Chromebook on the list of discovered devices, click Connect to IP Manually and enter your Chromebook’s IP address. Go to Settings > Network > Connected network > IP Address to check your Chromebook’s IP. Your PC’s desktop should appear on the Chromebook.
Important Duet Display Settings
While projecting or mirroring your display to the Chromebook, you’ll find a couple of important configurations on the app’s Settings page. Here’s what they mean and how they can impact your experience using the app:
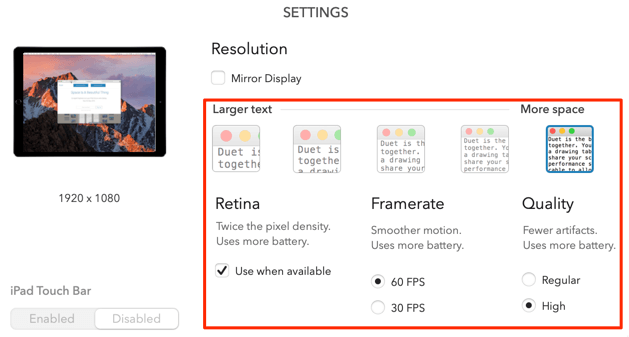
- Text Size: There are five text sizes to choose from. The larger the text size, the smaller the display resolution on your Chromebook.
- Retina Display: If you check the Retina option, Duet will simulate a retina display on your Chromebook by doubling the pixel density. While this setting will improve picture quality, it’ll cause the app to consume more battery power.
- Framerate: There are two options: 60 FPS and 30 FPS. Choosing the higher frame rate will provide smoother motion, but at the expense of your device’s battery.
- Quality: Duet also hands you the freedom to choose your preferred signal transmission quality. High quality provides the best experience with fewer digital artifacts. On Regular quality, texts and images will have more detail. Plus, the app will consume less battery power. The Duet app automatically adjusts your Chromebook’s display when you change any of these settings. For the best experience, we recommend the highest settings available. However, make sure you plug your devices into a power source when using the app.
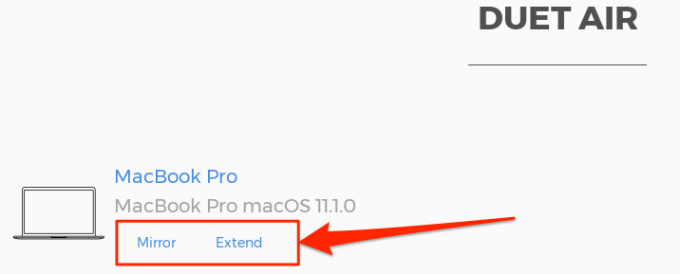
Flip the Switch
You can also use the Duet app to wirelessly project your Chromebook’s screen to a Mac or Windows PC. Connect the devices to the same Wi-Fi network and launch Duet Display. Your Mac or Windows PC should appear on the app’s dashboard on your Chromebook; select Mirror or Extend to project your screen accordingly. If you have any questions, drop a comment or visit the Duet Display Help Center for assistance.