Delete BlueStacks if several antivirus software flag the app as malware, if the program crashes your computer, or it uses excessive system resources. Jump to the next sections to learn how to uninstall BlueStacks from Mac and Windows computers.
How To Uninstall BlueStacks in Windows
There are several methods to remove BlueStacks from a Windows computer. You can uninstall the app from the Control Panel or by performing a system restore. BlueStacks also has dedicated uninstallers that remove the app and its files from your PC. Note: We utilized a Windows 11 PC for this tutorial, but it applies to Windows 10 devices also.
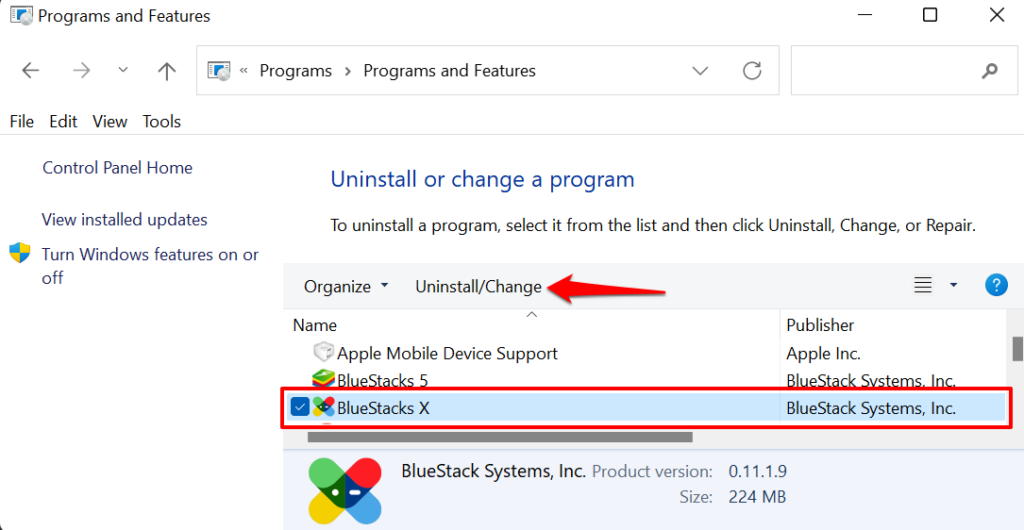
1. Uninstall BlueStacks via the Control Panel
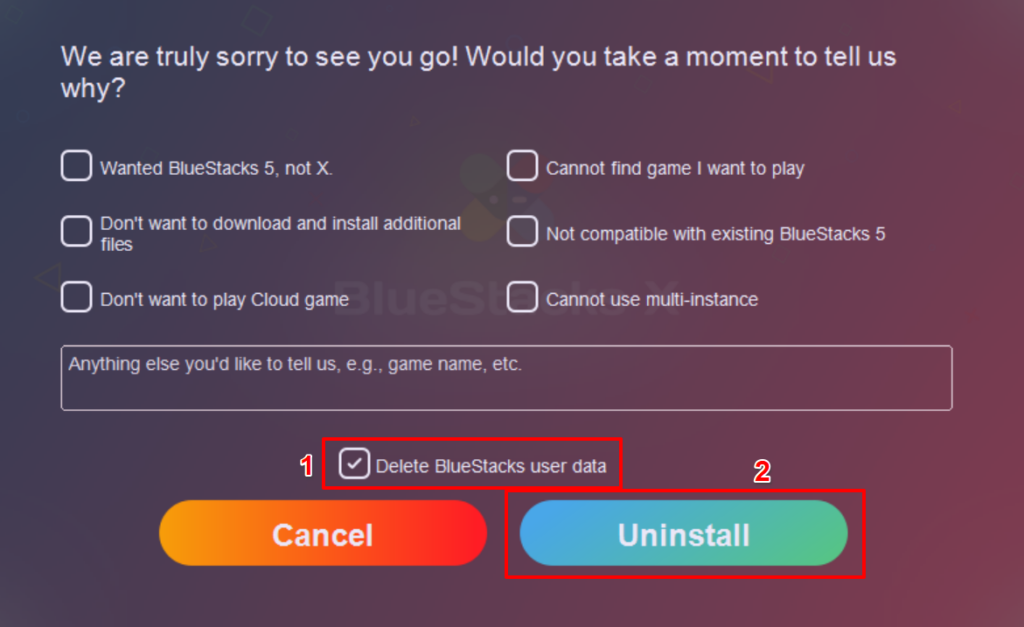
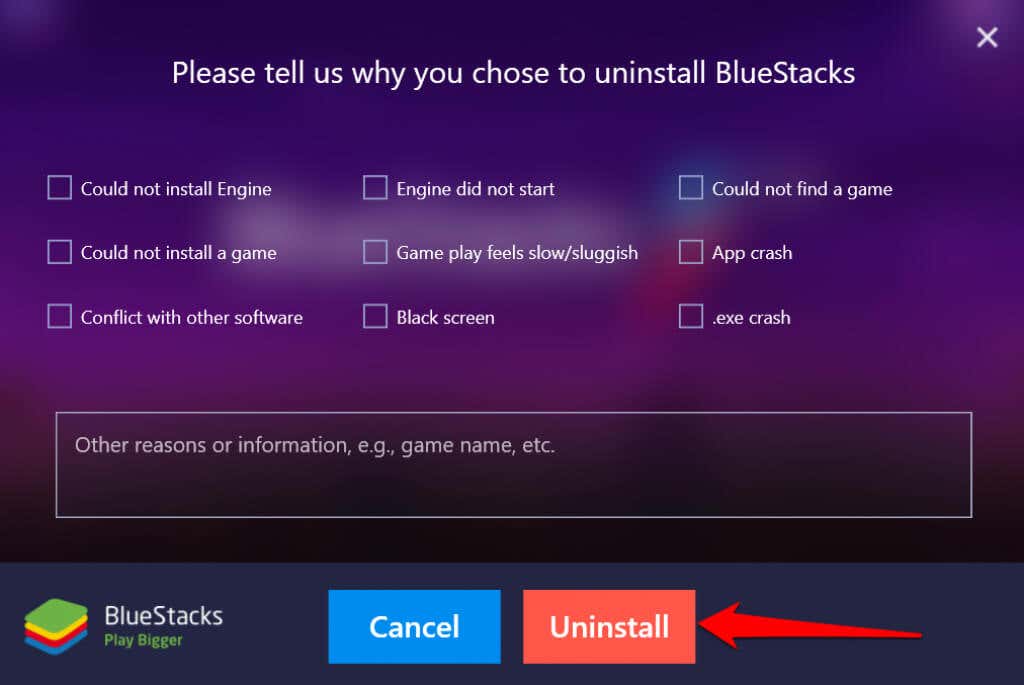
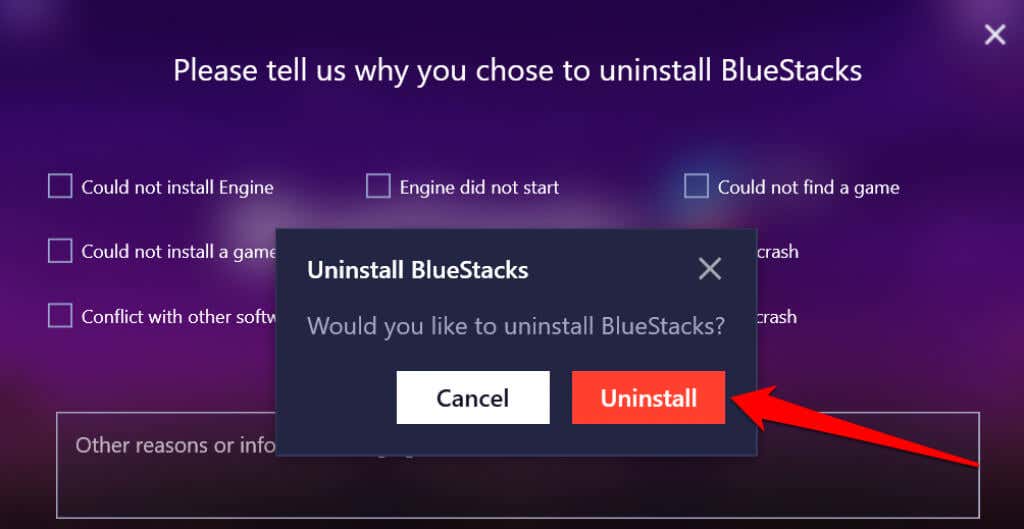
This is the easiest—but least effective—method to completely remove BlueStacks from Windows. This process uninstalls the app but leaves some residual files. If you choose to uninstall BlueStacks from the Control Panel, we recommend running other uninstallation techniques as a supplementary action to remove the app’s leftover files. That’ll launch the BlueStacks uninstaller, where you’ll be asked to provide reasons why you want to uninstall the app. Note: You might find “BlueStacks X” in the Control Panel. It’s an app developed by BlueStacks to allow Windows users to play Android-based games without installing them. It’s installed alongside the regular BlueStacks app, so you should also uninstall BlueStacks X if you want to remove everything BlueStacks-related from your computer.
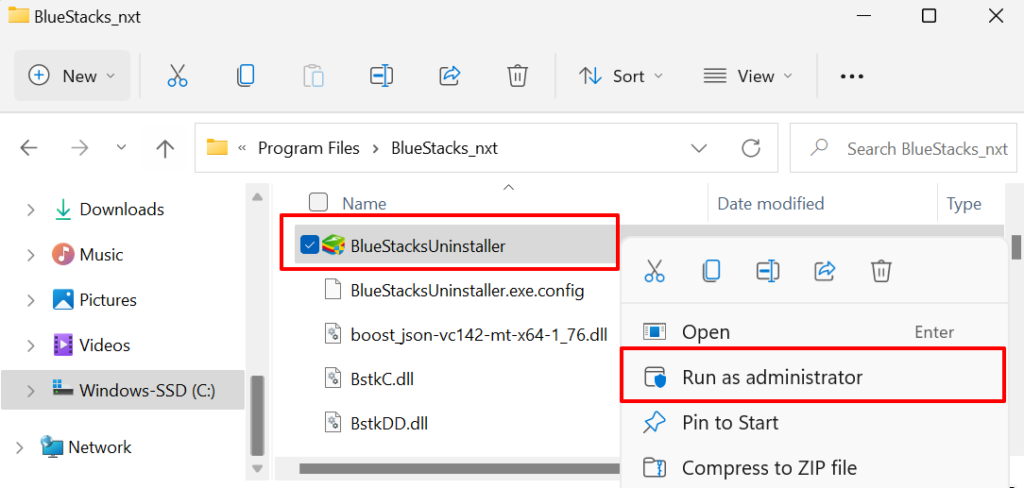
2. Uninstall BlueStacks using BlueStacks Uninstaller
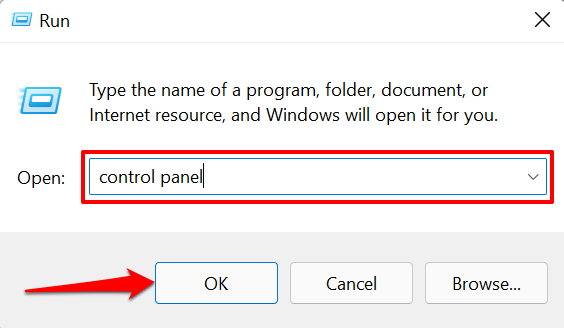
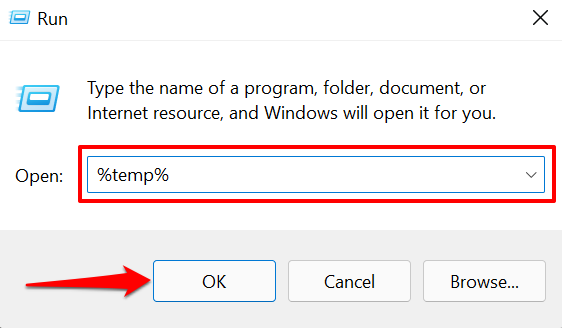
BlueStacks has a dedicated utility for removing the program from your Windows computer. You’ll find the uninstaller in your PC’s “Program Files” folder. If you can’t find the uninstaller, check the temporary files folder instead. You can also access the BlueStacks Uninstaller from the Windows Temp folder. Press the Windows key + R, type or paste %temp% in the dialog box, press Enter. Launch the BlueStacksUninstaller app and select Uninstall on the app’s dashboard.
3. Run the BlueStacks Cleaner
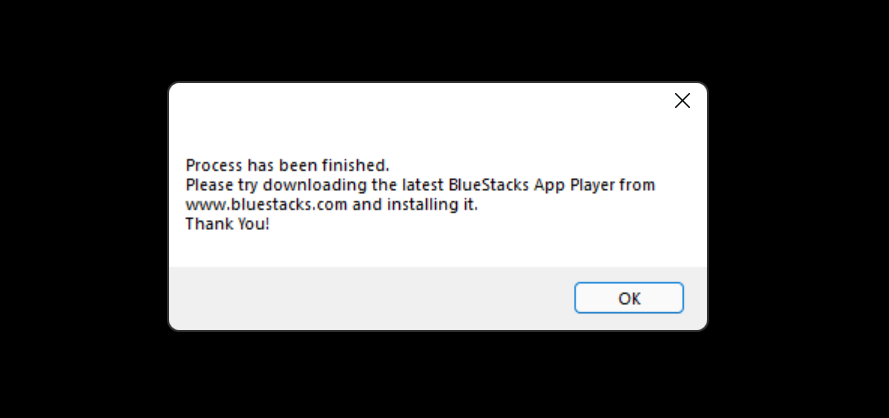
BlueStacks leaves many temporary and residual files on your PC, even after uninstalling the program. You can remove these files by uninstalling BlueStacks using the BlueStacks Cleaner. It’s a utility that not only uninstalls BlueStacks but simultaneously removes all the app’s data from your computer. That’ll delete the temporary files for all programs on your computer, including BlueStacks. Check out our tutorial that highlights other ways to delete temporary files in Windows. Wait for some seconds or minutes and select OK when the “Process has been finished” dialog box appears on the screen.
4. Uninstall BlueStack via System Restore
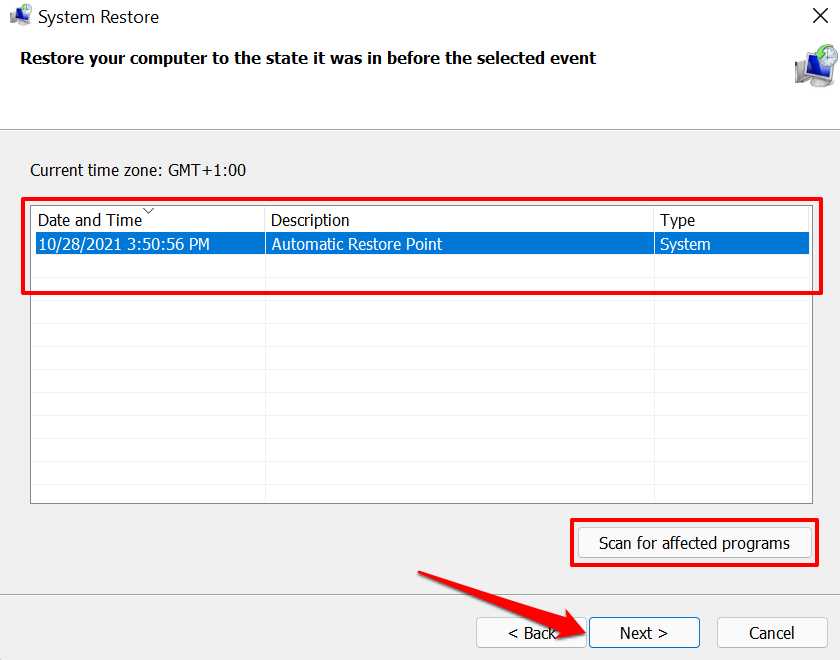
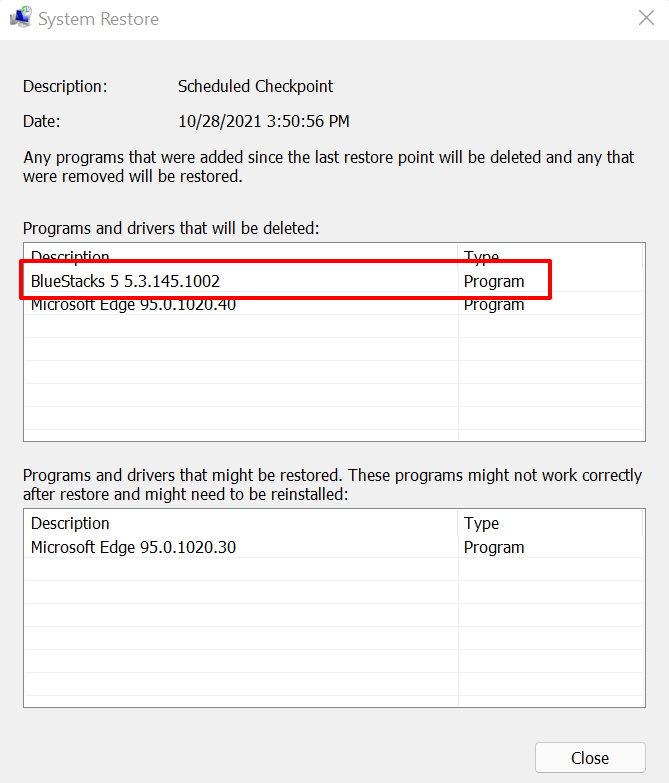
Another good way to uninstall BlueStacks in Windows is to roll back your computer to a previous state BlueStacks wasn’t installed. For example, let’s say your PC created a restore point on January 1st and installed BlueStacks two weeks later. Rolling back your PC to the January 1st restore point will uninstall BlueStacks and other applications installed after January 1st. Note that you must have System Protection enabled on your PC to undo system changes using System Restore. Refer to this tutorial on creating restore points in Windows for more information. Quick Tip: Select Scan for affected programs to see the applications and drivers that the operation will delete and restore on your computer. You should see BlueStacks in the list of “Programs and drivers that will be deleted.” Otherwise, select another restore point and scan for affected programs until you find the restore point that’ll uninstall BlueStacks. Can’t find a restore point in the System Restore window? Go through our tutorial on recovering missing restore points in Windows for troubleshooting solutions. System Restore will restart your computer to revert your computer’s configurations to the selected restore point. Close all programs and save all open files before you proceed.
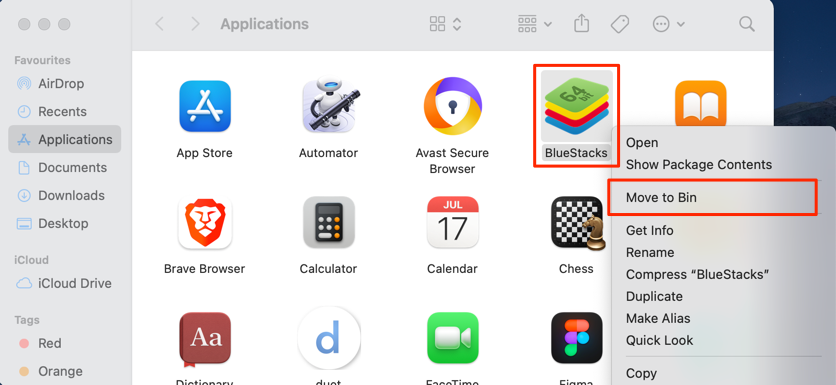
How To Uninstall BlueStacks in macOS
BlueStacks doesn’t have a dedicated uninstaller for macOS devices. So, you’ll need to use third-party cleaners to remove leftover files after uninstalling the app from your Mac.
Use Third-Party Cleaners and Uninstallers
Cleaning apps, storage management programs, and third-party uninstallers will thoroughly delete BlueStacks from your device. For example, CleanMyMac X is a good cleaning app for macOS. For Windows, try RevoUninstaller, Ashampoo Uninstaller, or third-party uninstaller programs that delete apps and scrubs away traces of residual registry entries and files.