The nice thing about screenshots on the Switch is that you can add text to them before you share. Then, either post them directly on social media or send them to your mobile phone to save for later. To prepare for that special game moment, here’s how to take, edit, and share screenshots on Nintendo Switch.
Take a Screenshot on Nintendo Switch
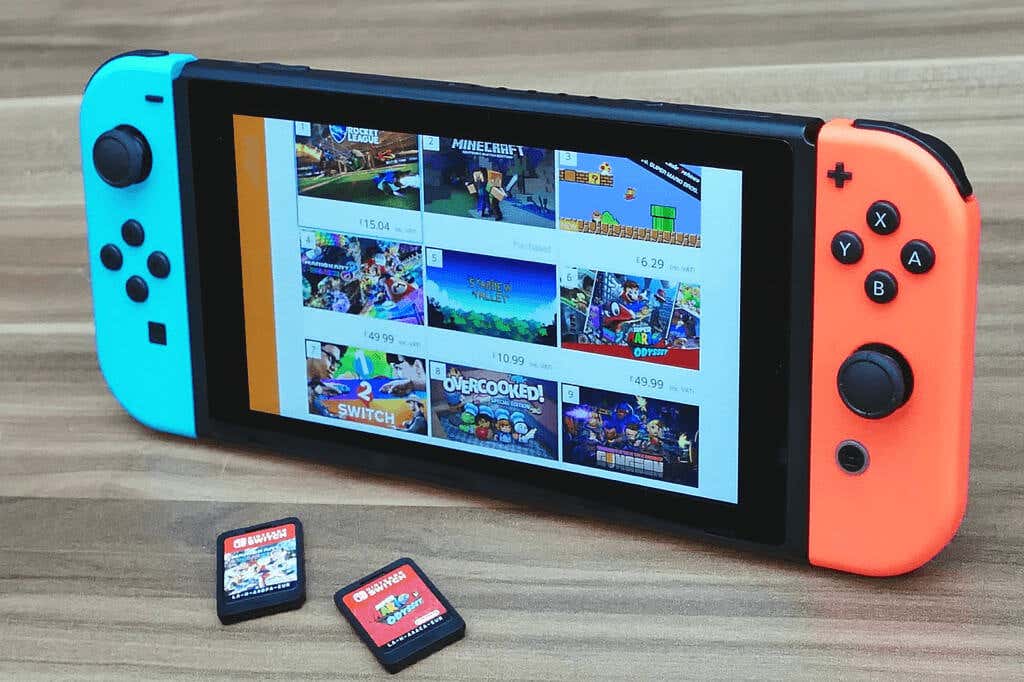
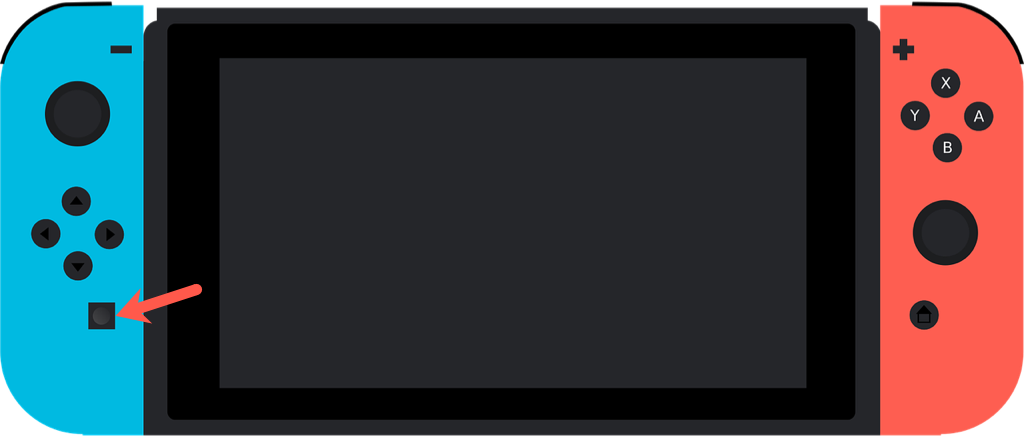
Capturing a screenshot on Nintendo Switch couldn’t be easier. Simply press the Capture button which is the square on the left Joy-Con below the controllers. On Nintendo Switch Lite, the square button is below the +Control Pad on the left. Note: Screenshots on Nintendo Switch are limited to gameplay photos and certain menu screens.
View Screenshots in the Album
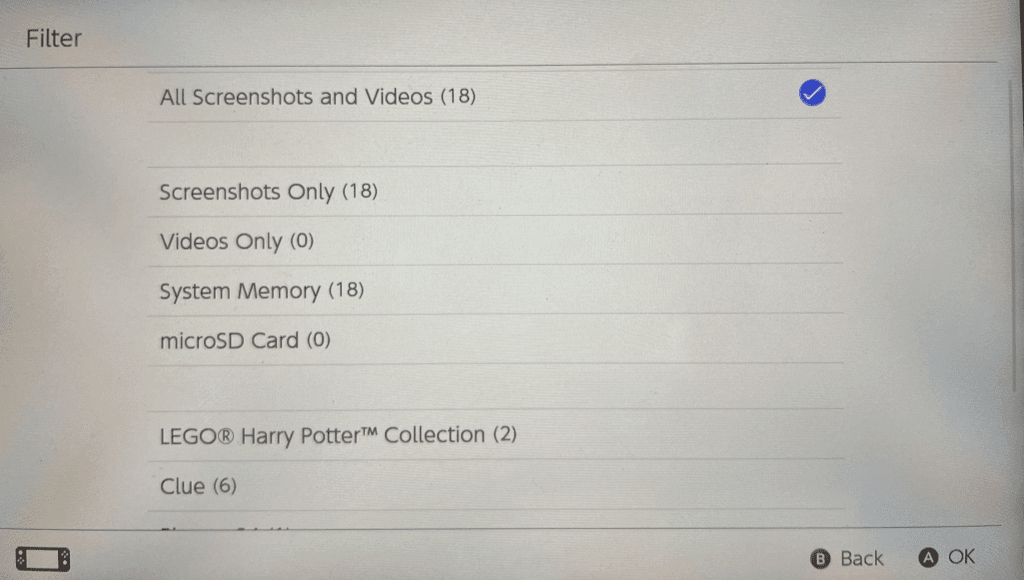
Once you take a screenshot, it is saved to your Album. From there, you can review your momentous shots. Of course, you can add some text and share them as well. On the Home screen of your console, tap or use the controls to move to and select the Album icon. This is the icon that looks like an image. You’ll then see all of your fantastic moments in one handy spot. To find a particular screenshot, you can apply a filter by pressing the Y button. Then filter by type or game.
Add Text to a Screenshot
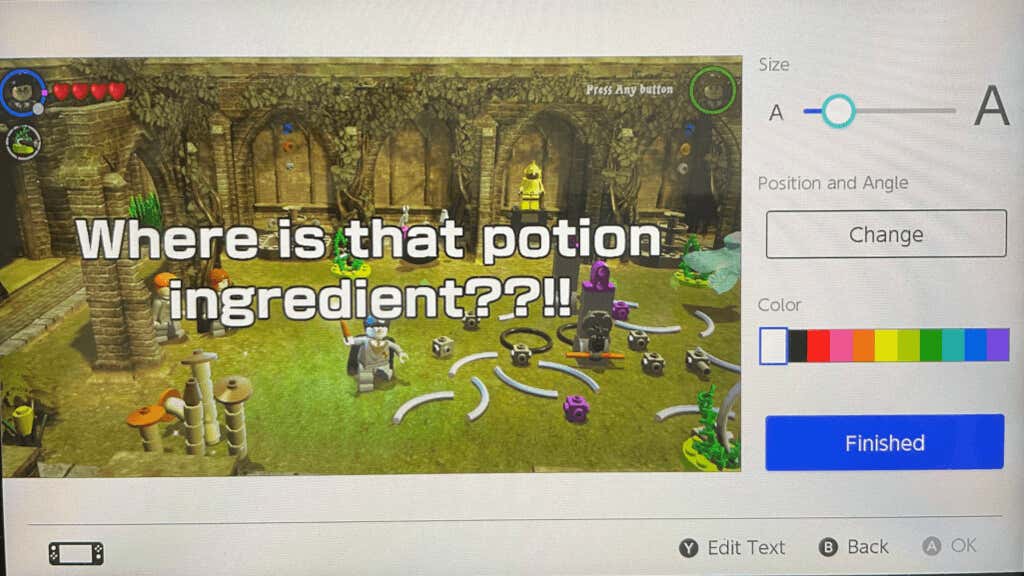
Maybe you’d like to add the date and time to the image, include your name, or just say “I beat your score, dude!” You can insert text right on the screenshot and format it as you like. You’ll then see your updated image, ready for sharing.
Share a Nintendo Switch Screenshot
To share your screenshot on social media, send it to your device, or copy it to a microSD card, press the A button for Sharing and Editing.
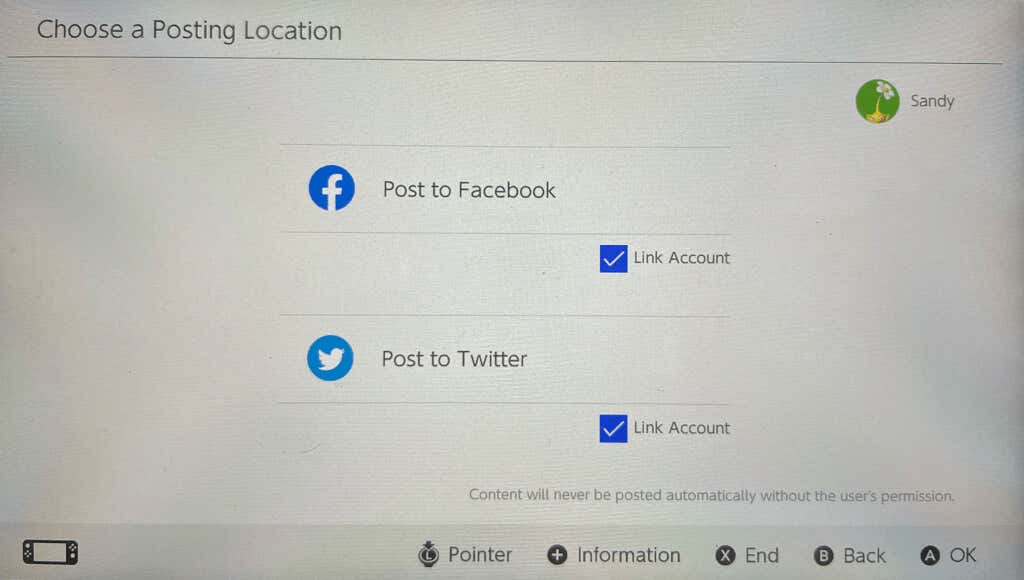
Post on Twitter or Facebook
If you’ve not yet linked a social media account, you’ll have the option to do so as you follow the steps below.
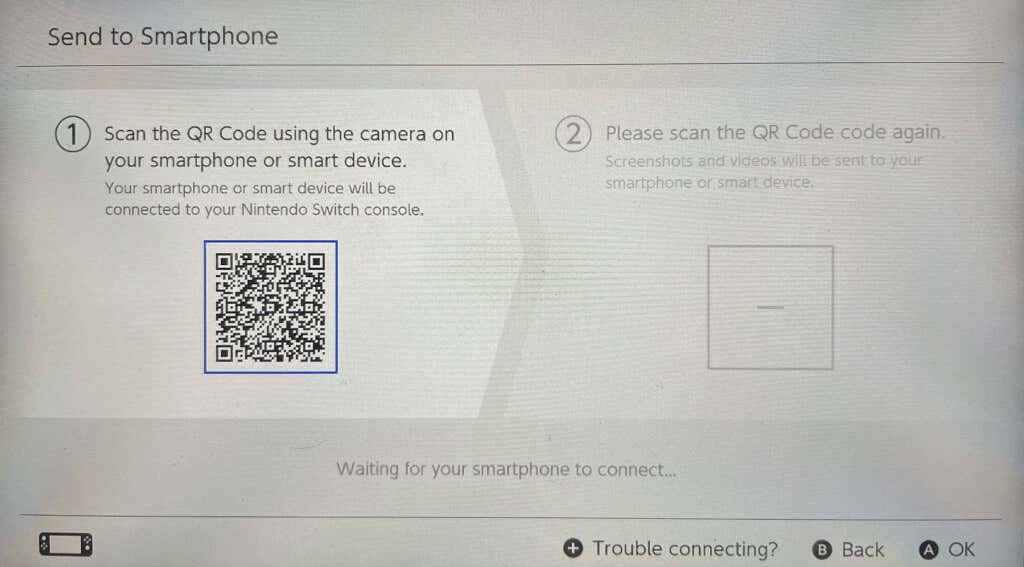
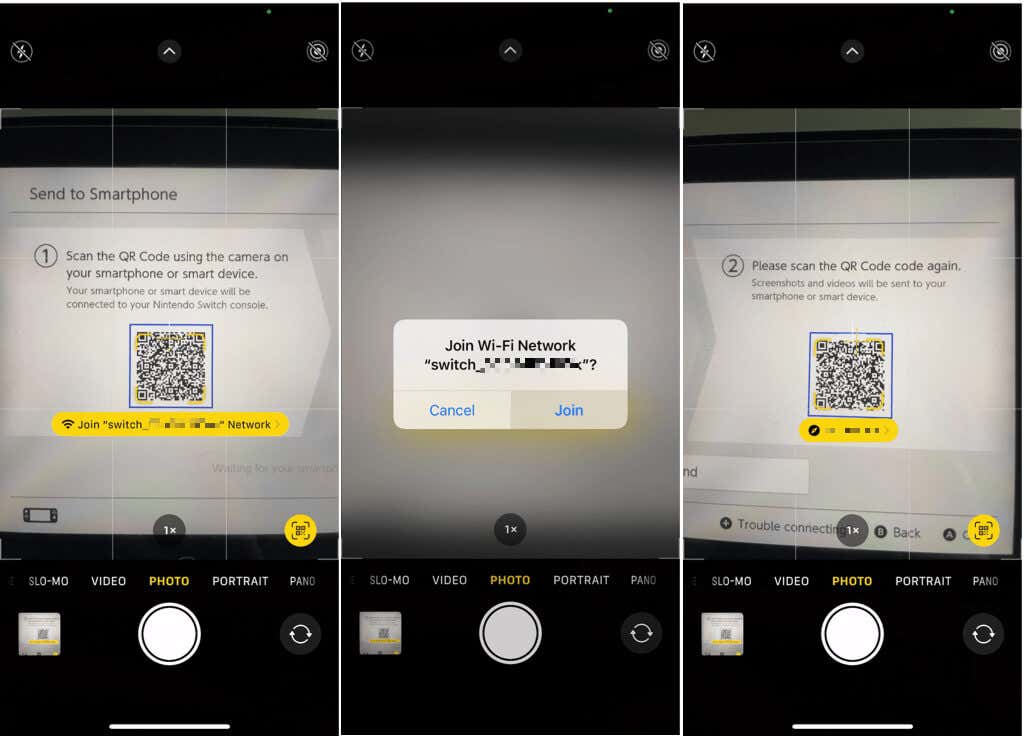
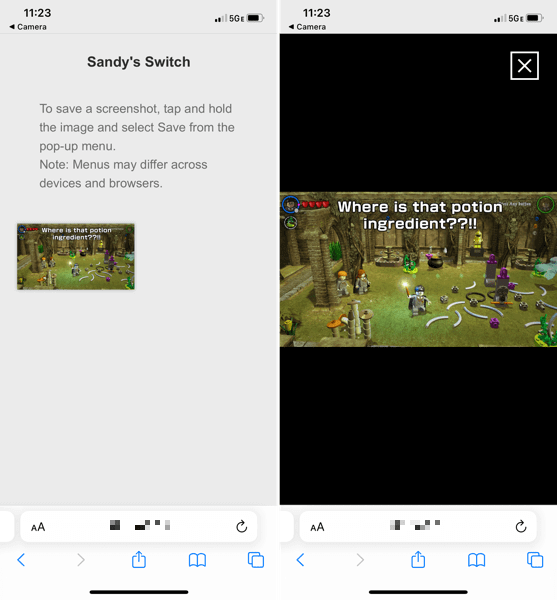
Send to Your Mobile Phone
You can send up to 10 screenshots via Wi-Fi from your Nintendo Switch to your Android phone or iPhone.
Copy to a microSD Card
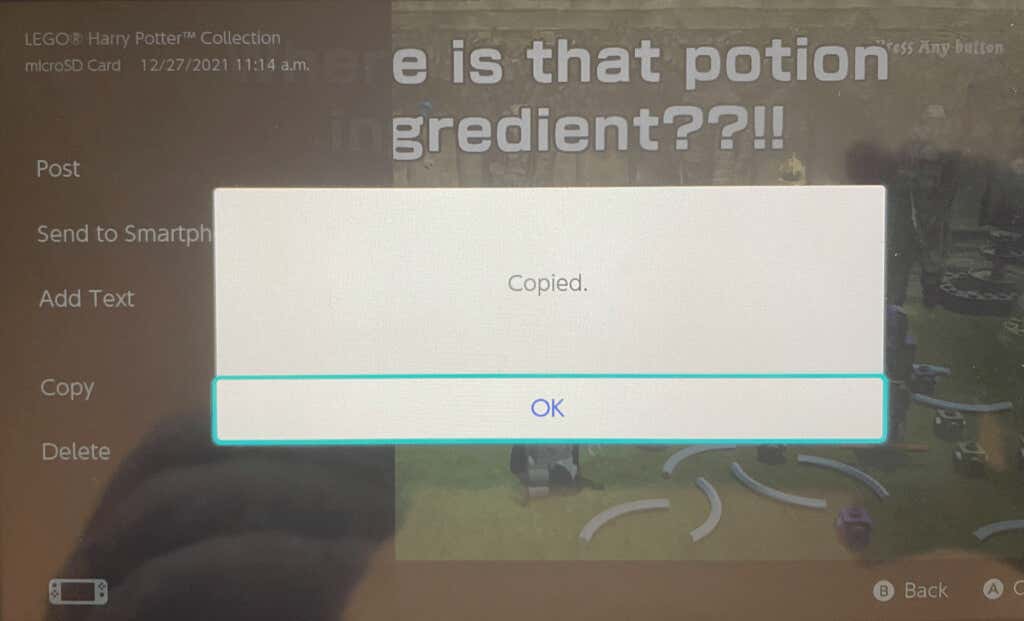
If you use a microSD card in your Nintendo Switch, you can also transfer screenshots by copying them to the card. Select Copy on the left side and confirm by pressing Copy. You should see a message that the image was copied, press OK to close the message and return to the image.
Delete Nintendo Switch Screenshots
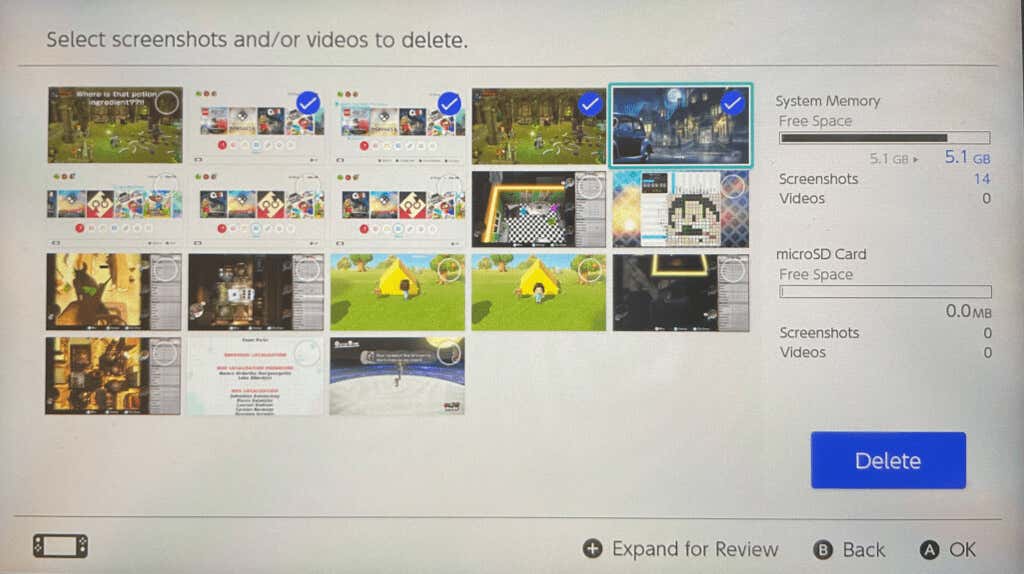
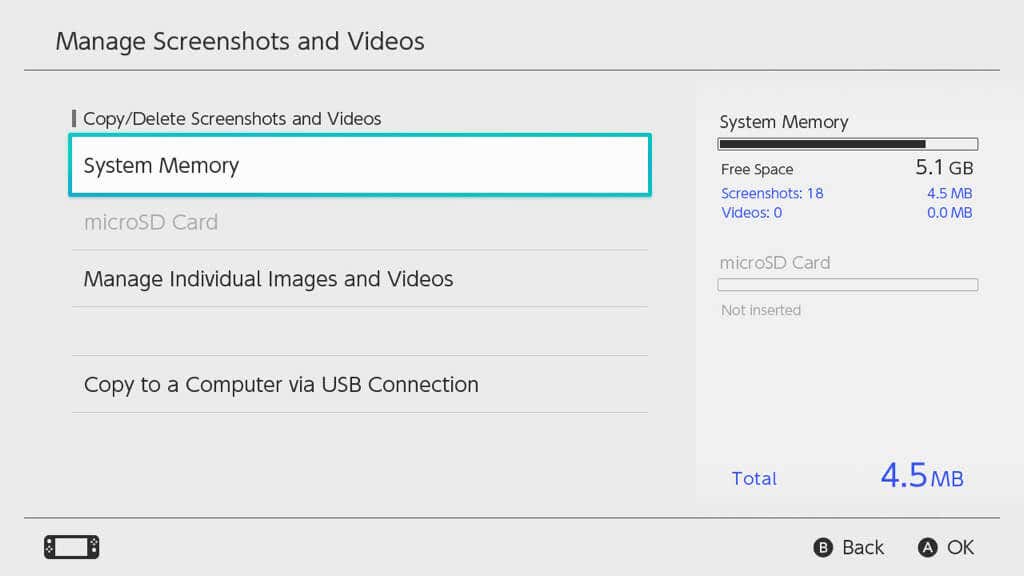
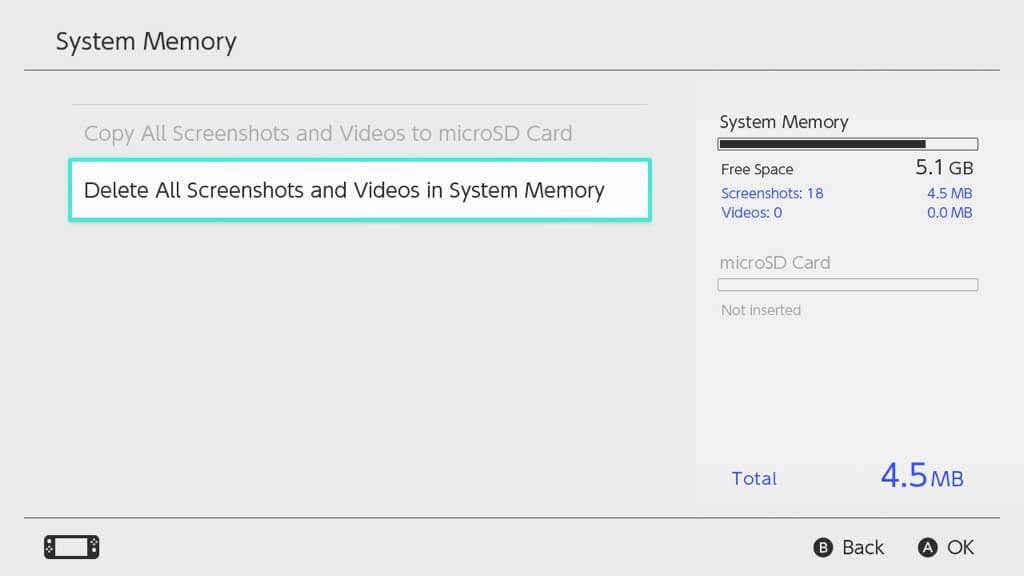
Once you start taking screenshots on Nintendo Switch, those images can build up over time. If you’re concerned about space or system memory, you can delete those screenshots you no longer want or need. To delete a single screenshot, select it to see it in full view. Then, press the X button and select Delete to confirm. To delete multiple screenshots, go to the main Album screen and press the X button. Select each screenshot to put a checkmark in the corner. Press Delete and then confirm by pressing Delete once more. To delete all screenshots, follow these steps. Whether you want to show your best pal that you outscored him or post on your social media account that you finally reached level 100, it’s easy to take screenshots on Nintendo Switch and share them! For more on Nintendo Switch or other consoles, visit the Gaming section on our sister site, Online Tech Tips.