There are a variety of DNS error messages that you may see on your computer. These errors range from messages like DNS_PROBE_FINISHED_NXDOMAIN and DNS_PROBE_FINISHED_NO_INTERNET to DNS_PROBE_FINISHED_BAD_CONFIG.
Luckily, it’s easy to fix most DNS-related issues on Windows, as this mostly only involves tweaking a few settings here and there on your machine.
Restart Your Router
When DNS issues occur, the simplest solution you can use is to reboot your router. Doing so refreshes your router’s connection, giving the device a chance to fix minor glitches. You can reboot your router by opening your router’s settings page in your web browser, accessing the Maintenance or similar tab, and choosing Reboot The Router. If you aren’t sure how to access your router’s settings page, press the Power button on the router to turn the device off. Then, press the same button to turn the router back on. You may also use the power socket switch to turn your modem off and back on.
Flush the DNS Cache and Release and Renew Your IP Address
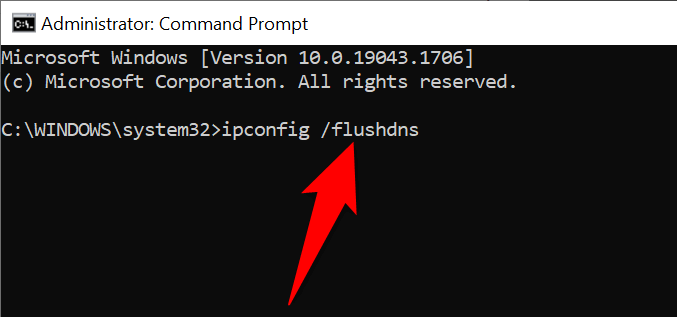
One possible reason you’re experiencing DNS problems with your Windows PC is that your DNS cache is corrupt. This makes your PC unable to translate domains into IP addresses, resulting in various DNS error messages. A quick way to get around this problem is to clear your PC’s DNS cache. This fixes nearly all your DNS-related issues without affecting the personal data you’ve stored on your computer. You can clear your DNS cache and release and renew your IP address as follows:
Enable the Microsoft LLDP Protocol Driver
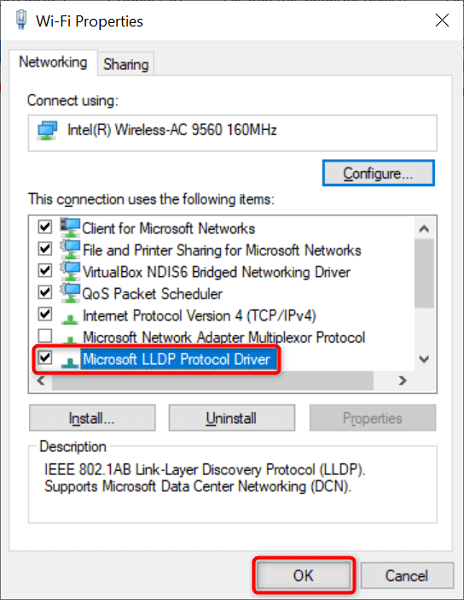
When your PC suffers from DNS issues, consider enabling Microsoft’s LLDP protocol driver. This driver comes with both Windows 10 and Windows 11 PCs.
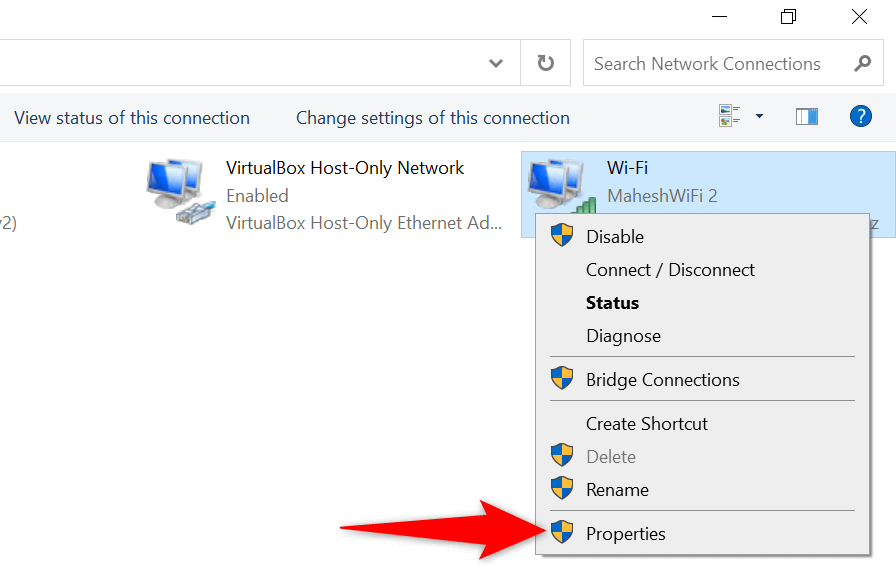
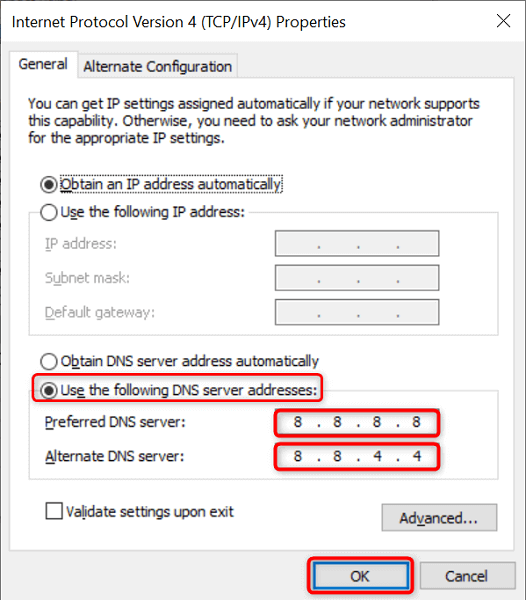
Use Alternative DNS Servers
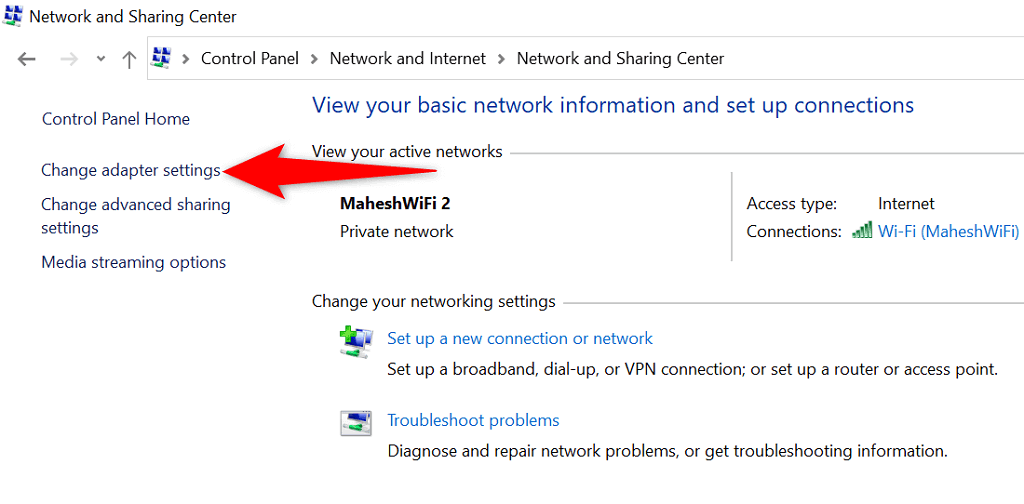
Unless you’ve configured a third-party DNS server, your Windows PC uses your internet service provider’s default DNS servers. These may not always work the best. So when you experience DNS problems, it’s worth switching to alternate DNS servers. You have several free and reliable DNS servers to choose from. You simply need to add these servers to your network settings, and your PC will start using them. We’ll show you how to add Google’s public DNS to your Windows PC.
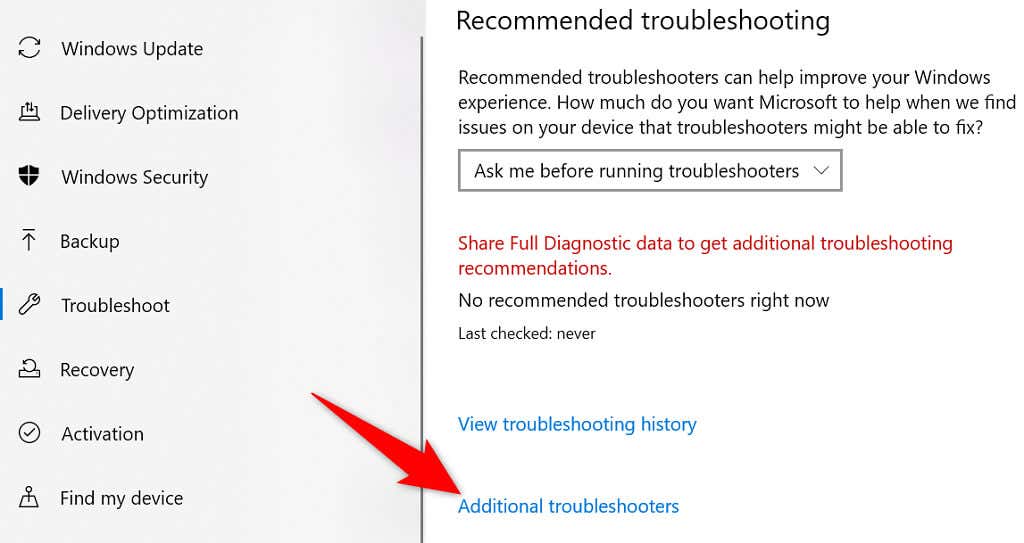
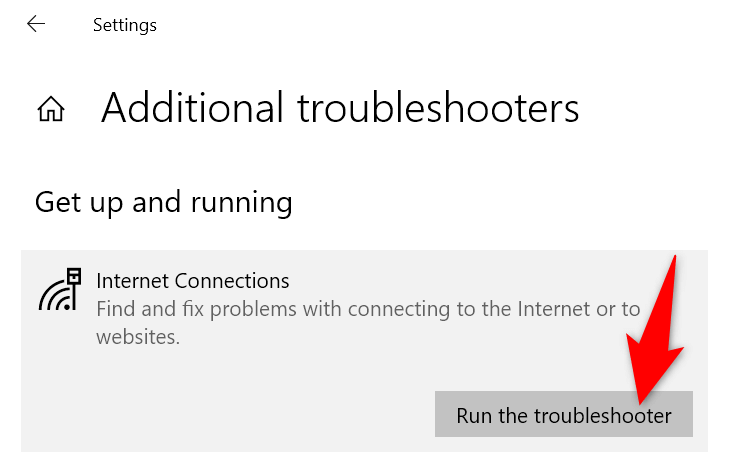
Use the Internet Connections Troubleshooter
Microsoft’s Windows 10 and 11 operating systems include multiple troubleshooters. These troubleshooters help you quickly find and fix various common problems on your machine. One of these is an Internet Connections troubleshooter, and, often, it can resolve DNS problems. The troubleshooter runs on automatic mode, for the most part, so you don’t have to specify any options in the tool manually.
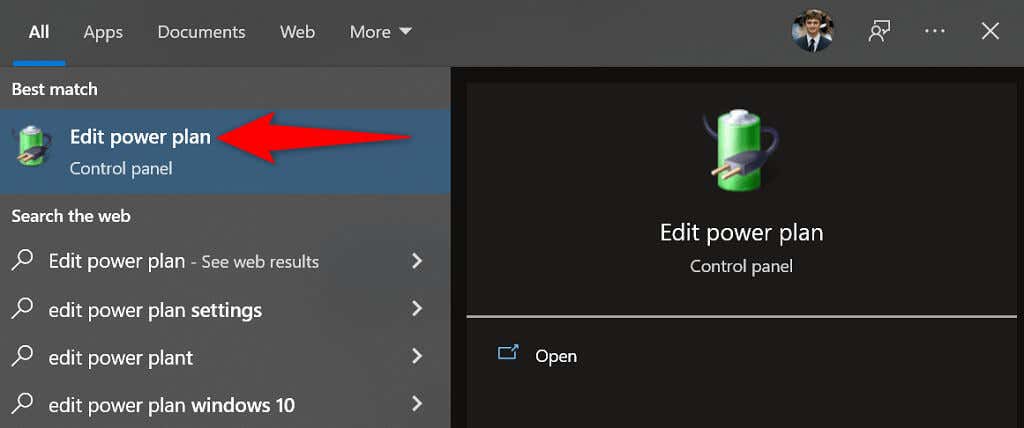
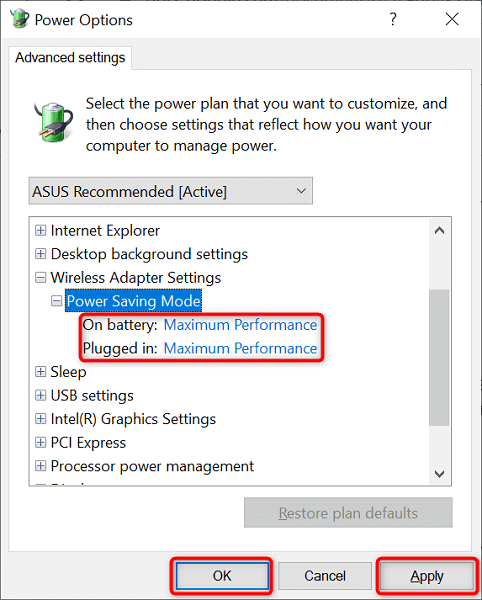
Change Your Network Adapter’s Power Settings
Your power settings control your PC’s various components to some extent. If you’ve chosen to disable certain adapter functions when your machine is on battery or is plugged in, you’ll have to tweak those options to resolve your DNS problems. It’s easy to change your power plan’s settings on Windows 10 and 11.
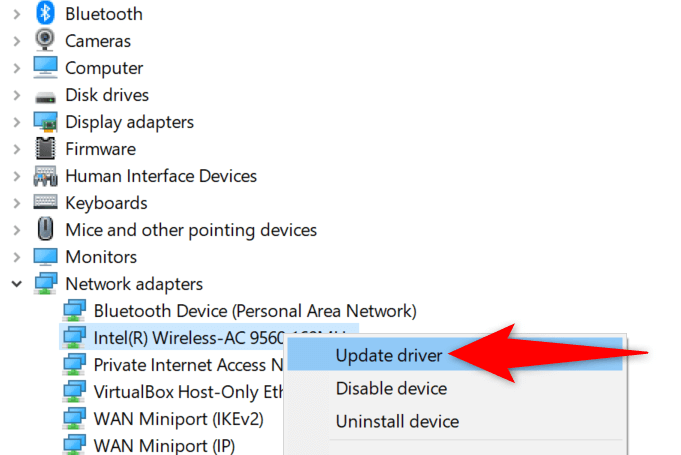
Update Your Network Adapter Drivers
Outdated hardware drivers can cause various issues, including DNS problems. So, you should keep your network adapter and other drivers up to date. This should likely fix the DNS issues you’re experiencing on your PC.
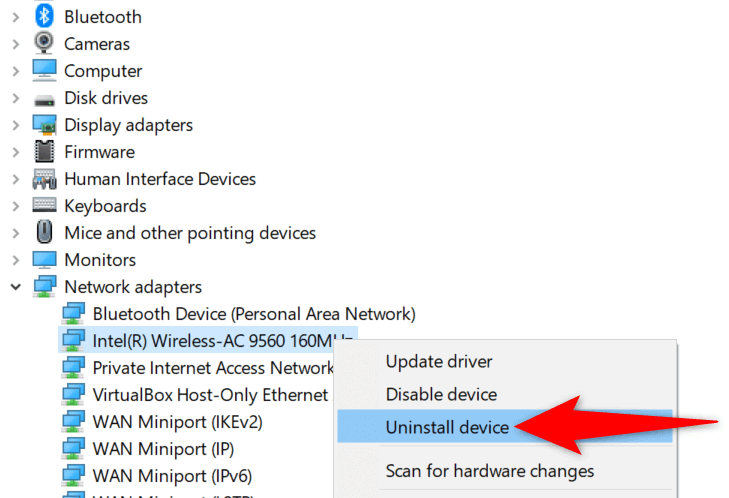
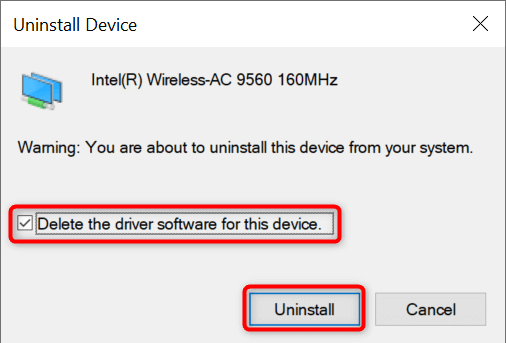
Reinstall Your Network Adapter Drivers
Faulty network adapter drivers can prevent you from connecting to the internet. You may be unable to fix such drivers by running an update check. However, you can uninstall and reinstall the drivers to eliminate the issue. Windows 10 and 11’s Device Manager makes it easy to tweak your adapter drivers.
Clean Boot Your Windows 10 or 11 System
If your DNS issues persist, one or more of the installed tools on your PC may be the culprit. One way to check if this is the case is by clean booting your Windows PC. Doing so keeps your installed tools from running, which helps find the problematic item. We have written a guide on how to clean boot your Windows PC, so check that out to learn the procedure. Once you’ve identified the app that causes problems, use either Settings or Control Panel to remove that item from your computer.
Experience DNS Issues No More on Your Windows 10 or 11 PC
DNS plays an important role in connecting your PC to the internet. If this component ever experiences problems, you’re basically disconnected from the world wide web. However, you can fix most DNS-related issues with ease. Once you tweak a few options here and there on your Windows system, your DNS issues are likely gone, and you’re back on the internet.