In this guide, we’ll tell you how to insert multiple rows in Excel in a few quick and easy steps. Choose one that works best for you.
How to Insert Multiple Rows by Dragging Border Selection
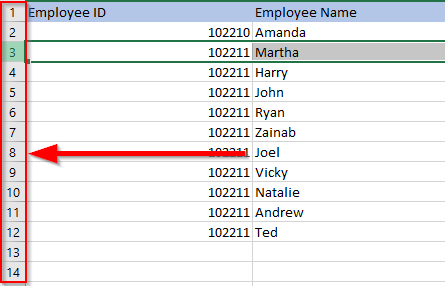
This is the quickest way to insert multiple blank rows into your Excel sheet. It’s easy and doesn’t require using any keyboard shortcuts either.
How to Insert Multiple Rows Using Excel Keyboard Shortcuts
If you don’t like the idea of multiple right-clicks while you work on your Excel sheet, there are two keyboard shortcuts you can use. First, select the number of rows equal to the number of blank rows you want to enter. Use Shift + Space to select all columns for the selected rows or select rows using row numbers on the left. Then use either of the two shortcuts: The shortcut method is scalable too. Pressing F4 on an Excel sheet repeats the previous action. You could use one of the above shortcuts to add, for instance, 10 rows and subsequently press F4 10 times to add 100 blank rows.
How to Insert Multiple Copied Rows Using Keyboard Shortcuts
If you want to copy or cut multiple rows instead of adding blank rows, use the Alt + I + E shortcut. You could also use the following shortcuts instead of Alt + I + E (the process is the same regardless of which shortcut you use):
Ctrl + Shift + =Control + Plus (plus sign must be from the numeric keypad)
How to Insert Multiple Rows Using the Insert Option
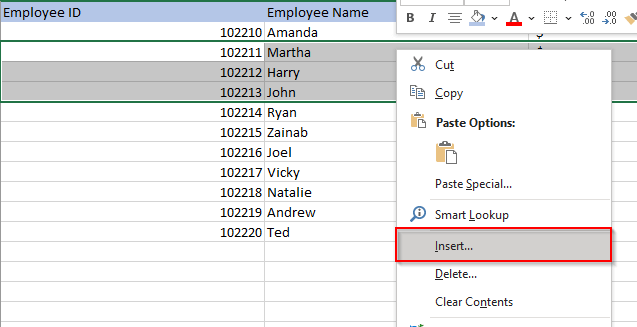
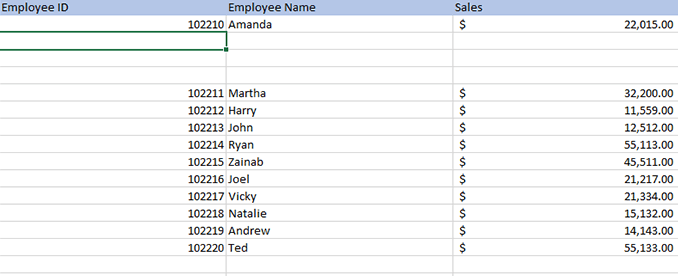
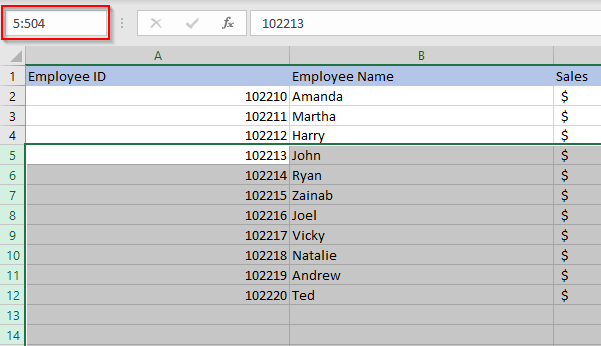
To use this method, all you need to do is select the number of rows you want to add, right-click on the selection, and select Insert. If you have a lot of columns in your data, press Shift + Space to select all columns for the selected rows, or select the rows using the row numbers at the left of the worksheet. When you select Insert, Excel will insert rows above the first row that you selected. If you want to enter a relatively larger number of blank rows, you could select a range and then use the Insert option. For instance, say you want to enter 500 rows.
How to Insert Multiple Rows Using an Excel Macro
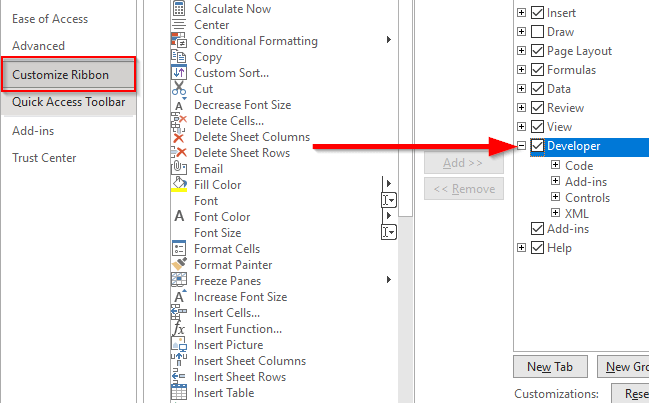
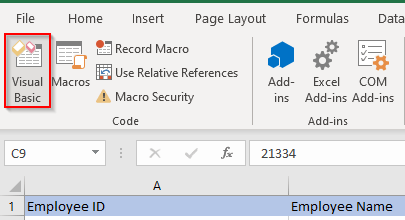
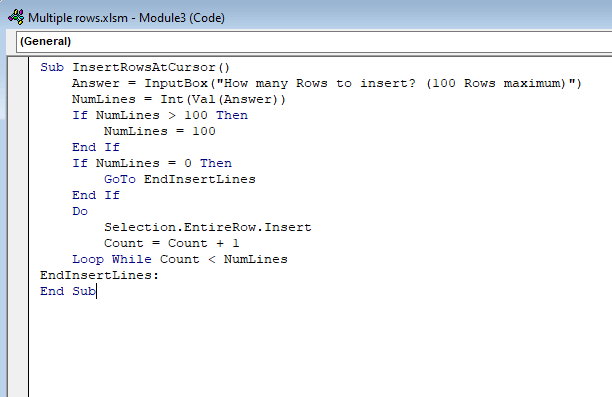
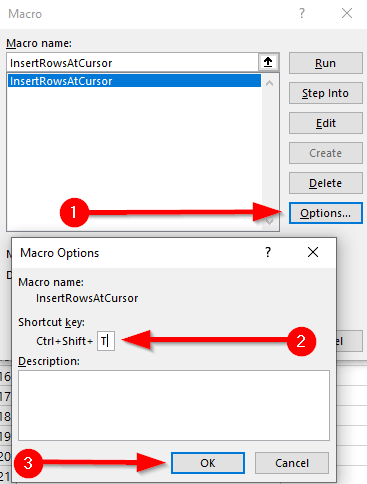
If you’re working with a large dataset on a worksheet that you expect to use regularly, you could automate row insertion using Macros. You don’t need to be an expert, though knowing the basics of VBA can give you a lot of power while you use Excel. Before you start the process, check if the Excel ribbon at the top has a tab called Developer. If it doesn’t, go to Files > Options > Customize Ribbon and check the radio button beside Developer. Every time you want to insert multiple rows in Excel, just use the shortcut, enter the number of rows, and you’re done. If NumLines > 100 Then NumLines = 100 End If If NumLines = 0 Then GoTo EndInsertLines End If Do Selection.EntireRow.Insert Count = Count + 1 Loop While Count < NumLinesEndInsertLines:End Sub
Inserting Multiple Rows in Excel
If you frequently use Excel, it’s worth learning about how you can save time on repetitive, mechanical tasks such as inserting rows. Since there are several ways to insert multiple rows in Excel, it’s just a matter of what method you feel comfortable with. If you’ve added a lot of blank lines within the data set, there are several ways to delete blank rows, too.