For example, you can use this software to measure distances, objects, and even angles. Photoshop has a special Ruler tool that allows you to not only measure distance, but also straighten and improve your images. Here’s how to use the Ruler tool to measure distance in Photoshop.
How to Measure Distance in Photoshop
If you’re looking to create a perfect image in Photoshop, you’ll need to mark distances in your photo precisely and create or cut out objects of calculated sizes. Photoshop has a handy Ruler tool that allows you to do that. With the Ruler tool you can create measurement lines between any two points of your image in any direction. The lines can tell you the size of an object you’re measuring, distance between objects, as well as angles and exact coordinates of an object in your photo. These lines are non printing and are only there to help you position your image or the elements of an image properly.
How to Use the Ruler Tool in Photoshop
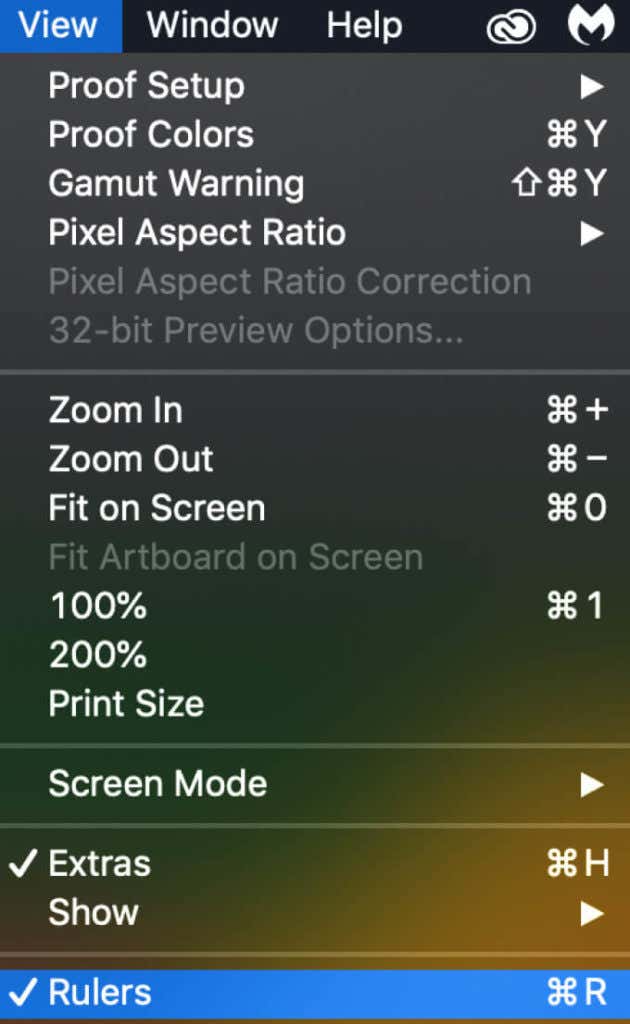
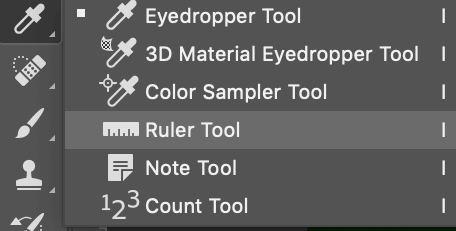
Before you can start measuring distance in Photoshop, you need to learn where to find the Ruler tool and how to read the measurement attributes. If you can’t see the Ruler tool when you open your image in Photoshop, select View from the menu, then select Rulers. Alternatively, you can use the keyboard shortcut Ctrl + R (for Windows) or Cmd + R (for Mac) to do the same. You’ll see the ruler scale and info panel appear around your image. By default, the Ruler tool displays distance in pixels, but you can change it to one of the following: inches, points, centimeters, millimeters, picas and percent. To change the measurement unit, right-click the ruler and select one of the options.
How to Measure Distance Between Two Points
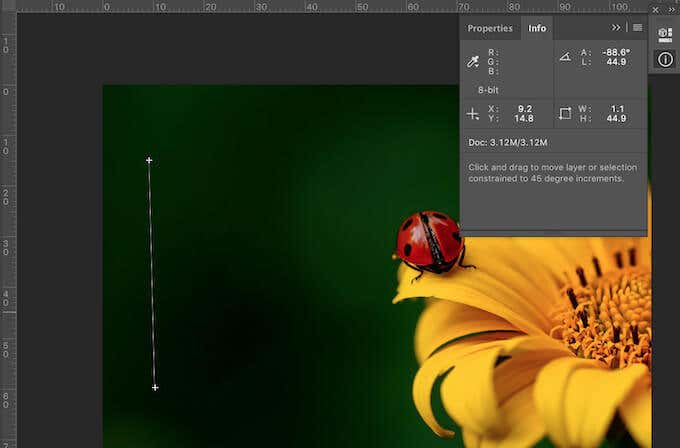
To measure the distance between any two points in Photoshop, you need to draw a measuring line using the Ruler tool. You can do that by following the steps below. You’ll then see a measuring line appear on your image. You can then use the Info panel to find the following information about your image or its elements:
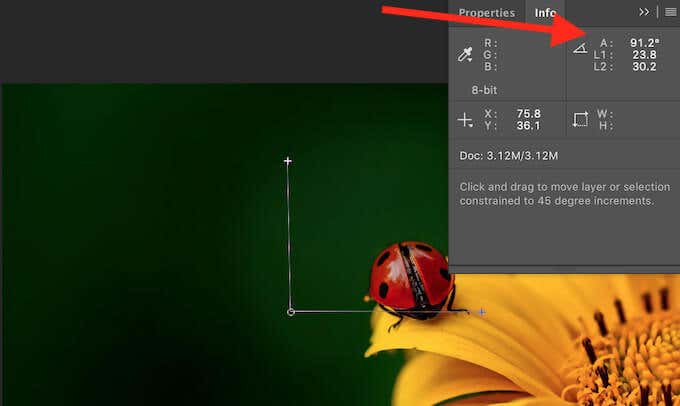
X and Y marking the starting location.W and H marking the horizontal and vertical distances traveled along the x and y axes.A displaying the angle measured relative to the axis.L which returns the length of the line. Lengths for more than one line will be displayed as L1, L2…and so on. Your document size.
Aside from the angle, all measurements on the Info panel are shown in the measurement unit that you previously set. If you didn’t modify the measurement unit, they’ll be calculated in pixels by default. If you already have a measuring line drawn in your document, it’ll be displayed on the screen when you select the Ruler tool.
How to Modify a Measuring Line
If you draw the measuring line in the wrong place by mistake, you can always edit it. To edit a measuring line in Photoshop, follow the steps below.
How to Measure an Angle in Photoshop
You can use the Ruler tool to measure an angle in your image by creating a Protractor. You’ll need to create two measuring lines instead of one to be able to read the angle between them. To do that, follow the steps below. In the Info panel you’ll find the angle between the two lines already calculated. It’s marked as A.
Learn to Do More in Photoshop
The Ruler tool in Photoshop can be extremely useful if you need to measure the exact distance between objects, find out the exact angle between lines, or get the exact coordinates of something in your image. You can even use this tool to straighten your image if you don’t want to crop it in Photoshop. Have you used Photoshop to measure distance before? Did you use the Ruler tool or another method to do it? Share your experience with Photoshop in the comments section below.