Microsoft rolls out Windows 10 updates in trickles—not everyone receives an update at the same time. When a Windows Update is available to the public, you may get the update immediately, or it may take days sometimes. However, if the delay is running into weeks or taking longer than usual, the troubleshooting techniques in this guide will help you force install a Windows 10 update on your device.
Do You Have the Latest Windows 10 Version?
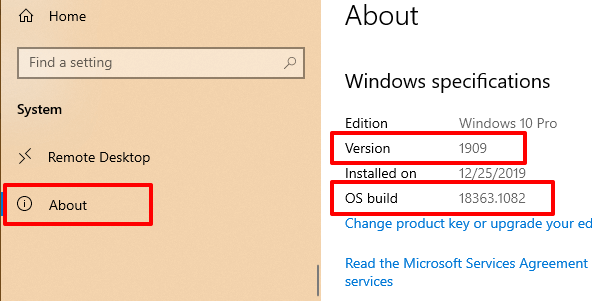
Before you try to force install an update, you need to first confirm that your device truly isn’t up-to-date. Go to Settings > System > About and scroll to the Windows specifications section, and take note of the OS build and version. Now, head to the official Windows 10 release information page, and compare your PC’s OS details with the latest Windows 10 version and build number on the list. If you don’t have the latest version, proceed to the next section to learn how to manually trigger a Windows update.
Force Window 10 to Update
There are several factors that delay a Windows 10 update. It could be due to low storage space, failure of essential system processes, and so on. If storage is the problem, the Windows Update agent will display an error informing you to free up additional storage space. Other factors, on the other hand, can be difficult to pinpoint. We’ve compiled some possible ways to force install a Windows Update by eliminating issues causing the delay.
1. Restart the Windows Update Service
This service handles the delivery of software updates to Windows devices. Your PC may fail to automatically download or install a new update if the service is malfunctioning or inactive. Restarting the Windows Update Service can force Windows 10 to install an update. Follow the steps below to get it done.
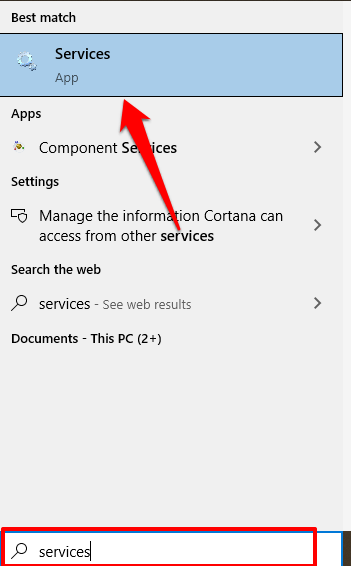
- Type services in the Windows Search bar and select Services in the results.
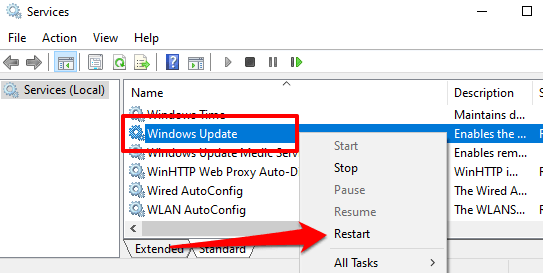
- Right-click Windows Update and select Restart. Return to the Windows Updates section in the Settings app and check if a new update is available for your computer.
2. Restart the Background Intelligent Transfer Service
The Windows Update Service depends on the Background Intelligent Transfer Service (BITS) to download updates from the Microsoft servers. Should BITS stop working, your PC may be unable to download and install updates. Restart the service and check if that fixes the problem.
- Type services in the Windows Search bar and select Services.
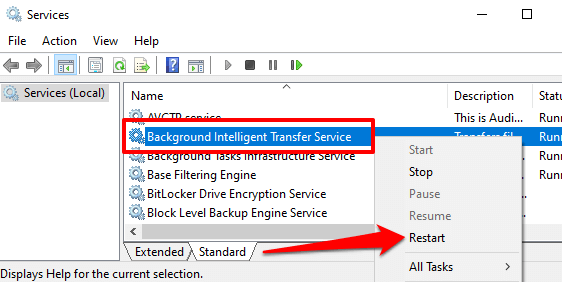
- Right-click Background Intelligent Transfer Service and select Restart. If the service doesn’t start, try other troubleshooting techniques in this guide on fixing issues with the Background Intelligent Transfer Service.
3. Delete the Windows Update Folder
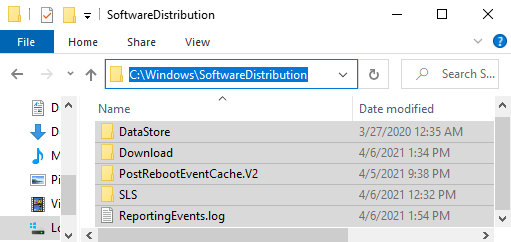
The Software Distribution folder houses the necessary files required to install Windows on your computer. If you’re yet to receive a globally available update, deleting the content of the folder could force Windows to acquire and install the latest OS build. Windows will automatically recreate the folder and re-download the files needed to update your PC. Before you proceed, there’s something important to note. The Software Distribution folder also holds files containing your PC’s Windows Update history. Therefore, deleting the folder means you can’t roll back to a previous Windows version. Additionally, updating your computer may take longer than usual. That’s because the Windows Update Service must first repopulate the Software Distribution folder before it installs any available update. To delete the Software Distribution folder or its content, you need to first stop the Windows Update Service and Background Intelligent Transfer Service.
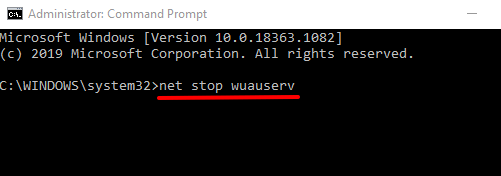
- Right-click the Start menu and select Command Prompt (Admin).
- Paste the command below in the console and press Enter to stop the Windows Update Service net stop wuauserv
- Paste the next command and press Enter. That’ll terminate the Background Intelligent Transfer Service. net stop bits
- Launch the File Explorer and go to Local Disk (C:) > Windows > Software Distribution and delete all items in the folder. If you can’t delete the files, or you’re getting an error message, restart your computer and try again. After deleting the Software Distribution files or folder, proceed to the next step to restart the background services you stopped earlier.
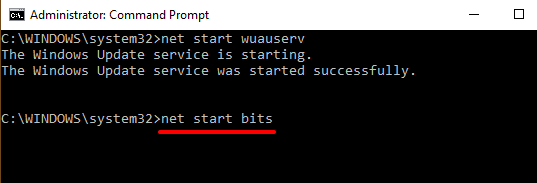
- Open Command Prompt as an administrator and paste the command below in the console to restart the Windows Update Service. net start wuauserv
- Afterward, paste this next command and press Enter to restart the Background Intelligent Transfer Service. net start bits Windows will automatically re-download the files required to update your computer to the latest OS build. Now check if the latest Windows build is available.
4. Perform Windows Update Cleanup
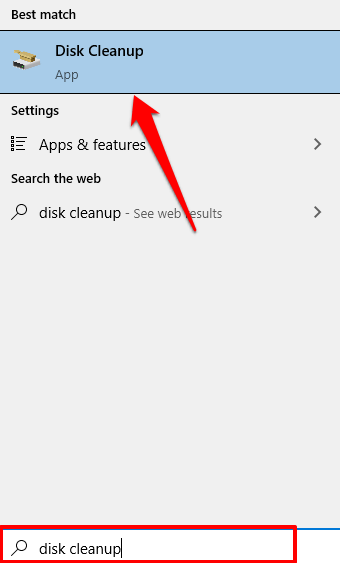
When you install newer Windows 10 builds, Windows stores the system files of older updates on your device. This lets you uninstall an update or roll back the operating system to a previous version. However, these system files often consume storage space and cause problems with future Windows Updates. Use the Disk Cleanup tool to perform a Windows Update cleanup and try installing the update again.
- Type disk cleanup in the Windows Search bar and select Disk Cleanup in the result. Wait for the tool to calculate how much freeable space you have on your PC. This might take some seconds, or minutes—depending on your PC’s storage size and configuration.
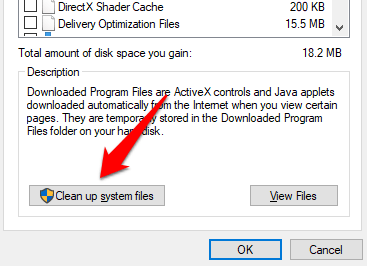
- Click the Clean up system files button. The Disk Cleanup tool will recalculate the freeable storage space on your local disk, taking system files into account this time.
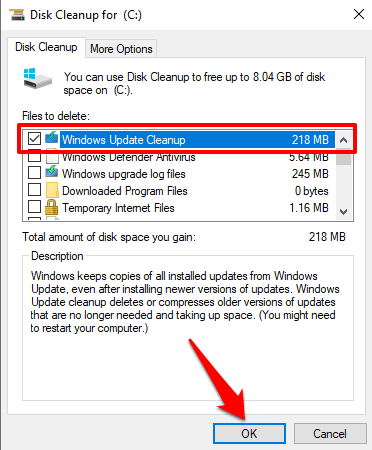
- Check Windows Update Cleanup, uncheck other options, and select OK to proceed.
5. Run Windows Update Troubleshooter
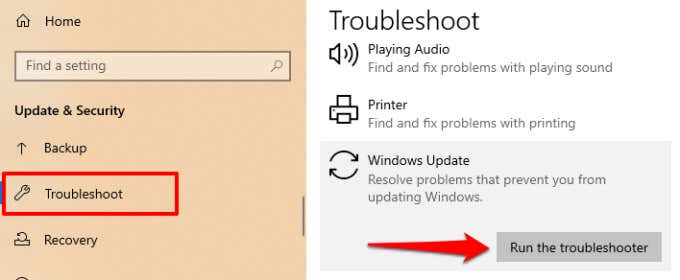
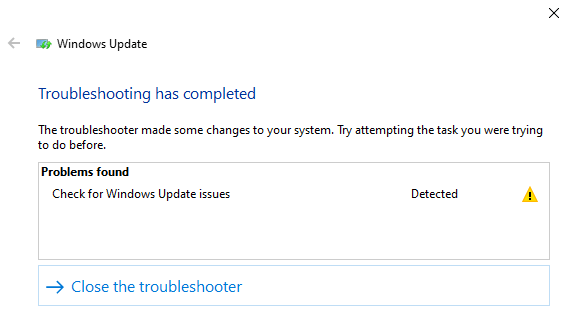
If you still can’t install a Windows Update after deleting all associated files, try using the built-in troubleshooting tool to diagnose and fix issues delaying the update. Go to Settings > Update & Security > Troubleshoot > Windows Update and click the Run the troubleshooter button. The Windows Update Troubleshooter will scan for issues preventing your computer from installing an update. When the diagnosis is complete, go to the Windows Update menu and check if you can now install an update. If nothing changes, restart your computer and try again.
6. Use the Windows Update Assistant
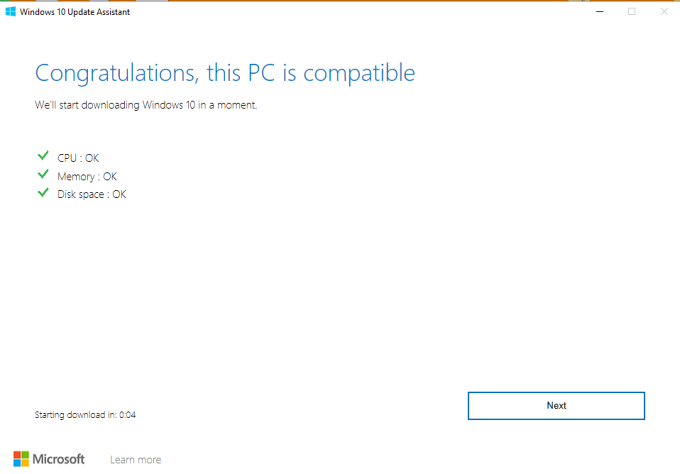
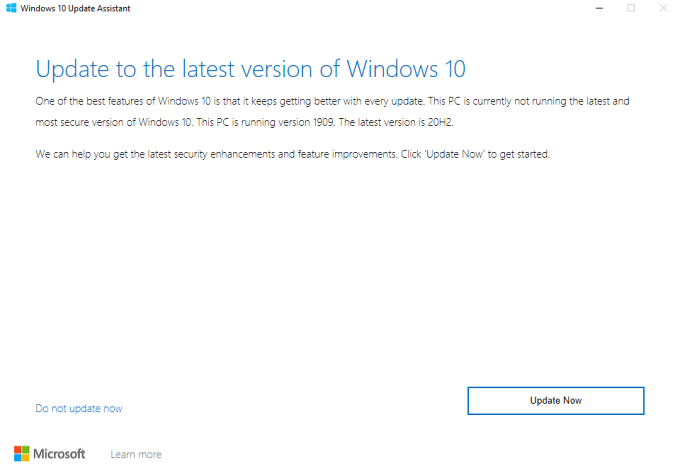
Not only can the Windows Update Assistant force install an update, but it’ll also run a compatibility scan to ensure your computer meets the requirements for the latest Windows 10 build. Head to the Windows 10 Download page on your browser and select the Update now button to download the Windows Update Assistant setup file. Double-click the setup file to install and launch the Windows Update Assistant. Select Update now to proceed. The tool will check if your device is compatible with the latest Windows 10 version. Select Next and the Update Assistant will download and install the update on your PC. This may take a while, depending on the size of the update, your internet speed, and other factors.
Sometimes, You Can’t Force Windows Updates
You may be unable to force a Windows Update if Microsoft places a Safeguard Hold on your PC. A “safeguard hold” is a technique used to temporarily prevent users from installing an unstable or potentially harmful update. So, how do you identify a safeguard hold? Go to Settings > Updates & Security > Windows Update. If there’s a safeguard hold on your computer, you’ll find this error message on the page: “The Windows 10 Update is on its way. Once it’s ready for your device, you’ll see the update available on this page.” Microsoft strongly advises against opting out of a safeguard hold—i.e., manually installing an update when there are known performance issues with the update. Wait until the issues with the update are fixed or when the safeguard is lifted.
