This error indicates that your processor doesn’t have virtualization enabled. This could be due to many reasons, from a security precaution to a conflict with another technology. Thankfully, there are many easy fixes for this issue. Here are all the ways to resolve this common VirtualBox error.
Fix 1: Enable VT-X From BIOS
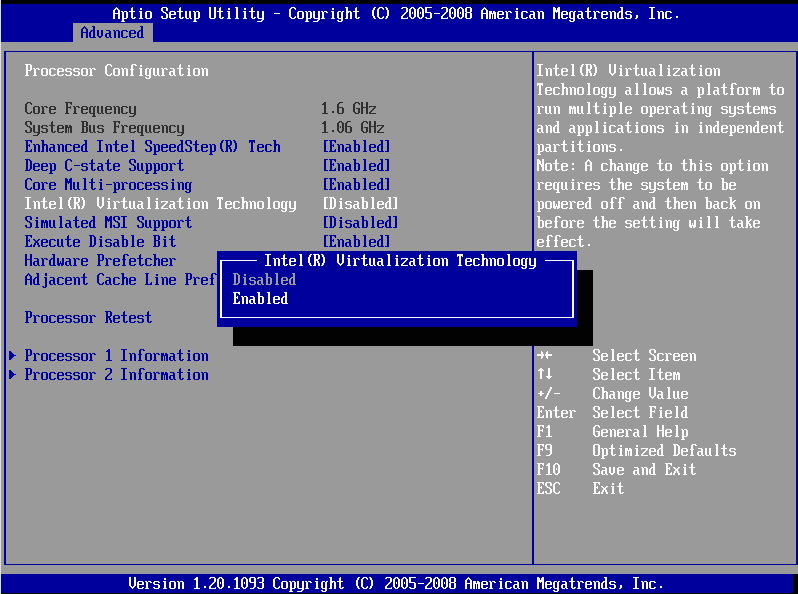
The simplest explanation for getting a “VT-x is not available” error is that the feature is just not enabled on your computer. This is likely if it’s your first time running VirtualBox on the machine. To fix it, you only need to access the BIOS settings and enable the VT-x and VT-d options. It’s usually named the Intel Virtualization Technology or the SVM mode in AMD computers. You may have to poke around in the various BIOS menus, though, as the placement of the option varies between different Motherboards. On some, you will find it under Security; on others, under Advanced.
Fix 2: Disable Hyper-V
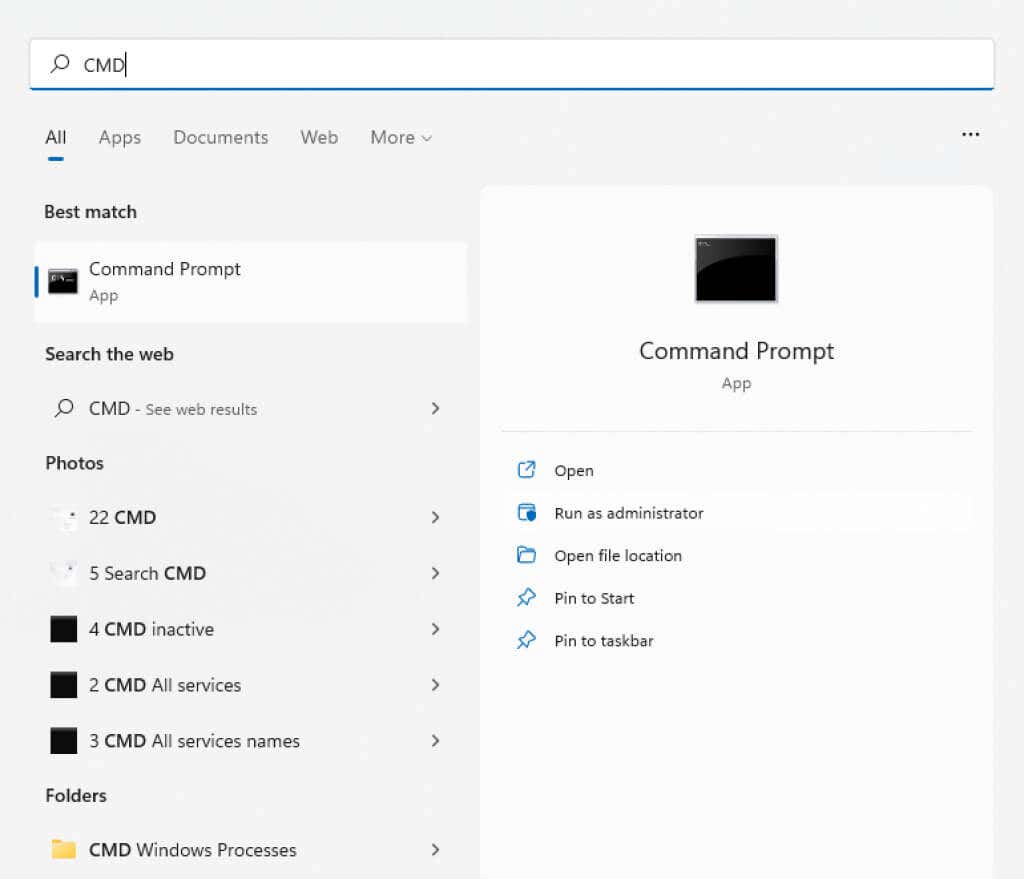
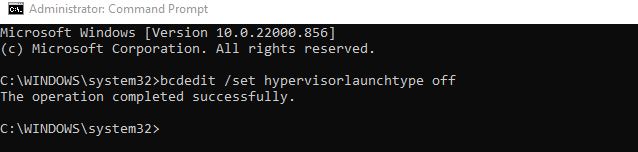
Microsoft Windows has its own version of virtualization, and it doesn’t play nice with third-party tools like VirtualBox. You must disable it to remove the conflict and get VirtualBox working correctly. The feature is called Hyper-V, and it’s not present in all versions of Windows. Only 64-bit versions of Windows 10 Pro, Enterprise, or Education possess Hyper-V. If you’re using Windows 10 or Windows 11 Home edition, you can safely skip this step. This will edit the Boot Configuration Data, removing the Hyper-V service from the list. This prevents DISM (Deployment Image Servicing and Management) from automatically adding the service back when it updates the Windows image.
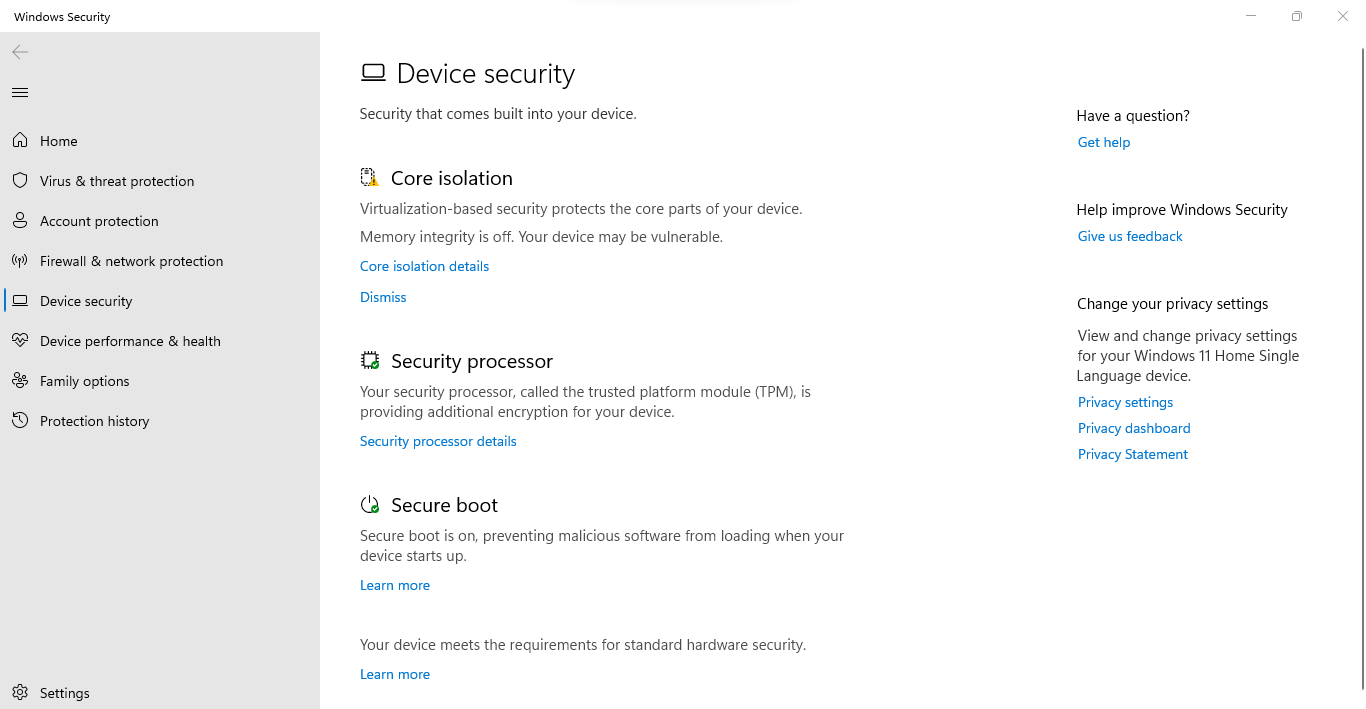
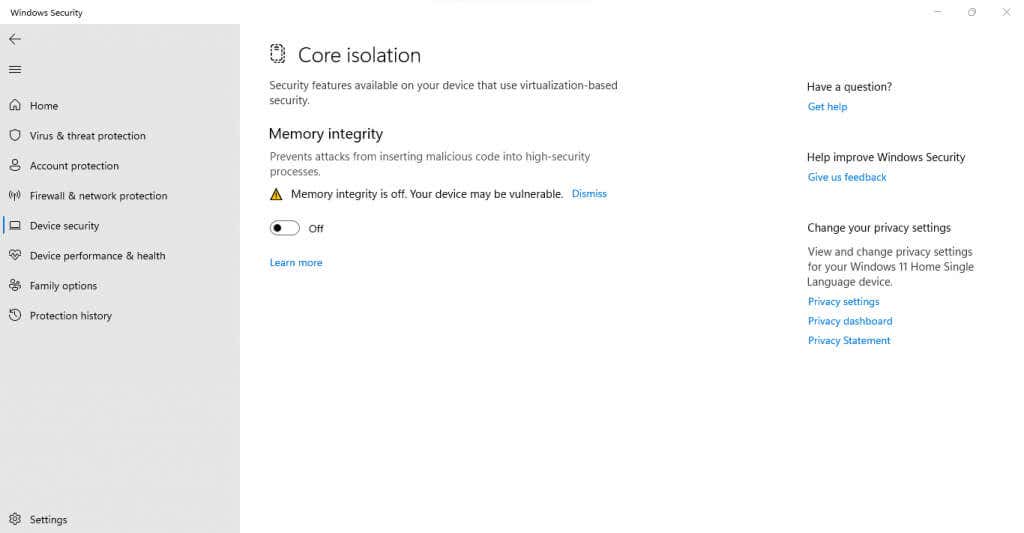
Fix 3: Disable Memory Integrity
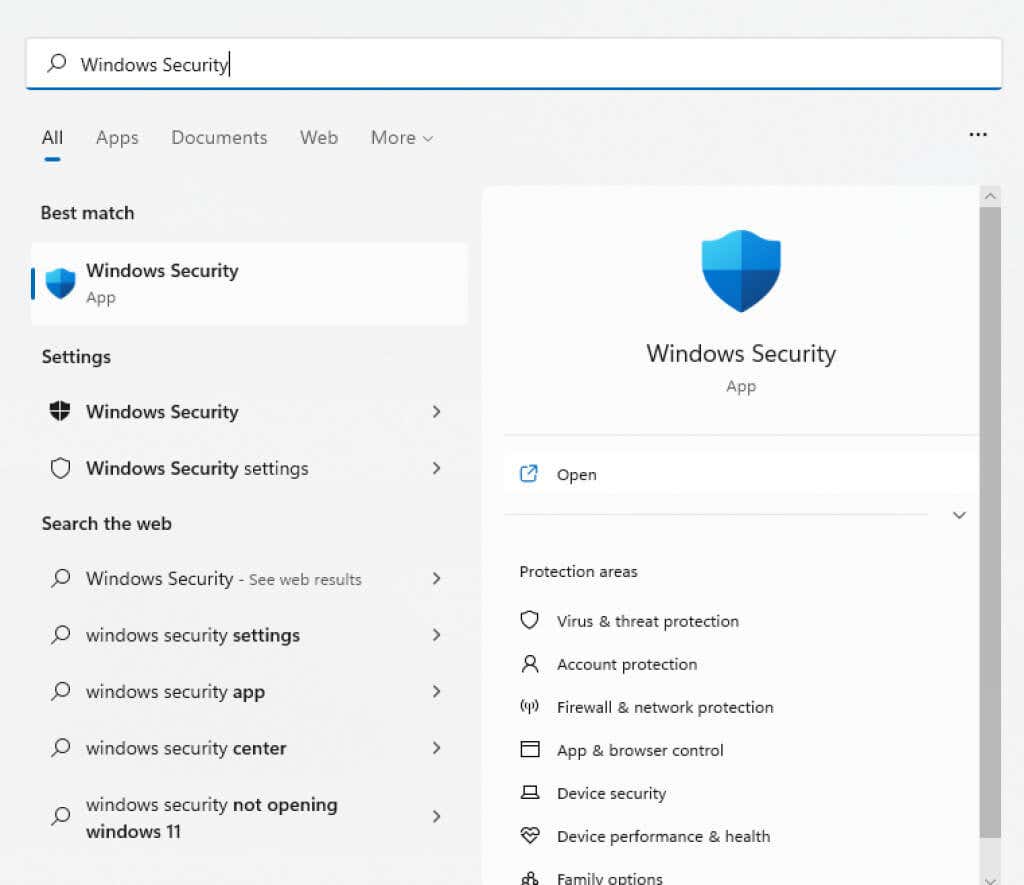
Windows Security includes a virtualization-based protection feature that can detect low-level code injection and protect your PC from even the most dangerous malware. But just like Hyper-V, this creates a conflict with VirtualBox. Most users don’t need the advanced security provided by Core isolation. Modern laptops have it disabled by default, as it conflicts with built-in software used to optimize hardware performance.
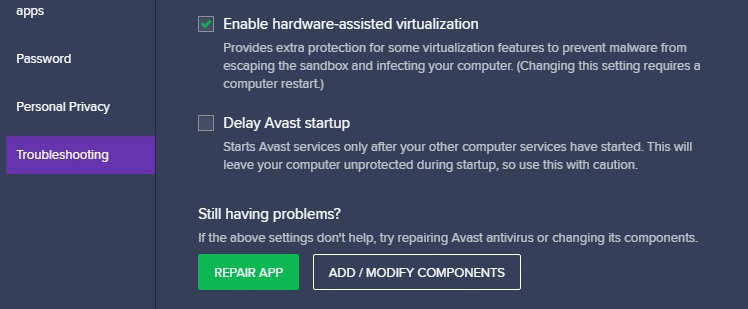
Fix 4: Check Your Antivirus Settings
If you’re using a third-party antivirus tool, the application may block some virtualization features on your PC. Avast, for example, automatically disables VT-x on some computers. You have to look at the settings of your antivirus app for anything related to hardware virtualization and make sure to allow it. In Avast, you need to check General > Troubleshooting > Enable hardware-assisted virtualization.
What is the Best Way to Fix the “VT-x is not available (VERR_VMX_NO_VMX)” Error in Windows?
Having Hyper-V virtualization running and interfering with VirtualBox is the most common reason for getting a VT-x error on Windows 10. You can fix that easily by disabling the feature through the command prompt.
The error also appears on many PCs because virtualization is disabled on their BIOS. That one is just as easily solved – open the BIOS settings and enable the Intel Virtualization or SVM mode.
Finally, your system could get the VT-x error due to overzealous security features. Disable Memory integrity from Windows Security, and look at the settings of your third-party antivirus to find and resolve any conflicts. VirtualBox should run without any trouble now.