Various network issues can cause Chrome to display the above error. Once you fix those underlying problems, Chrome will start working as it should and let you access your websites. Before you start following the methods below, make sure that your error message appears for all sites and not just a particular site. If the issue only occurs for a specific site, that site might be experiencing problems. If that’s not the case, follow the methods below.
Restart Google Chrome
The easiest way to fix most issues in Chrome is to relaunch the browser. When you do that, Chrome re-establishes all your browser connections allowing you to connect to your sites.
Make Sure Your Internet Works
Probably the most common reason Chrome displays the “Server IP Address Could Not Be Found” error is that your internet connection is not working. You should ensure your connection works optimally and fix issues if any. A quick way to check is to open another web browser (or another internet-connected app) on your computer and launch a site. If the site loads, your internet is working fine. If the site fails to load, you’ll have to resolve the issue with your connection.
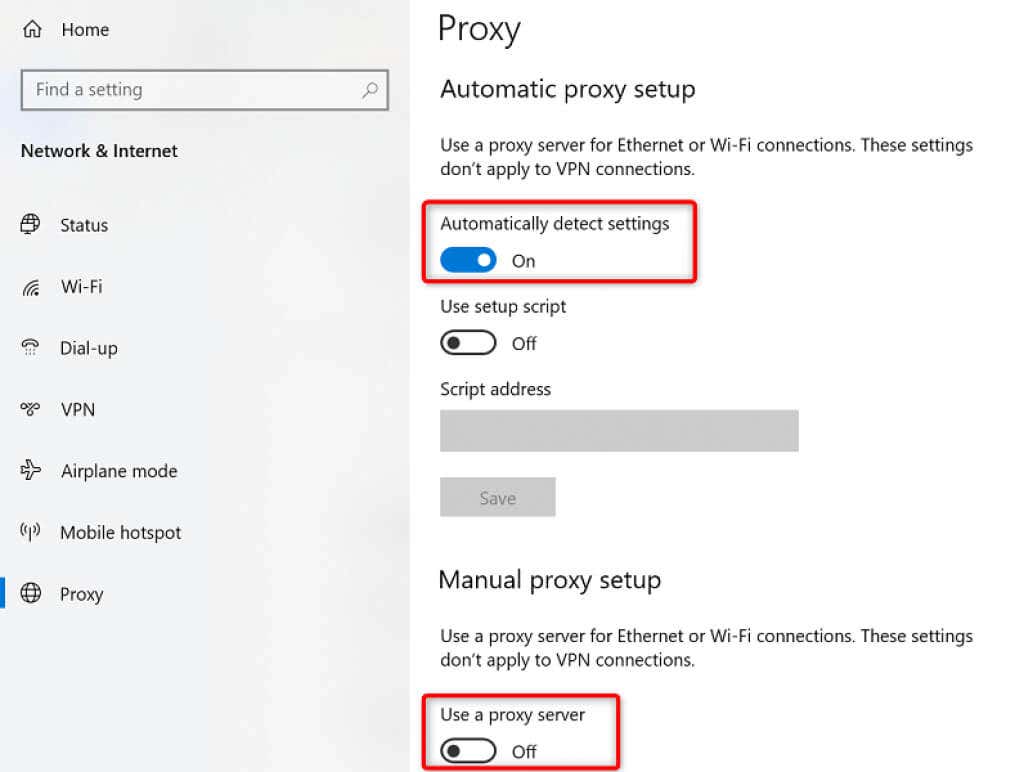
Verify Your Proxy Settings
If you’ve configured a proxy server or aren’t sure what proxy settings your PC uses, it’s worth checking those settings to ensure they aren’t interfering with Chrome. Here’s how to do that.
Turn Off Your VPN
If you use a VPN with your PC, consider turning off your VPN service and see if that helps fix the problem. Often, VPNs cause various network issues, and it’s worth temporarily disabling those services to resolve problems. The exact steps to disable a VPN vary by the app you have. However, you’ll find the button to turn off the service on the main screen in most VPN apps.
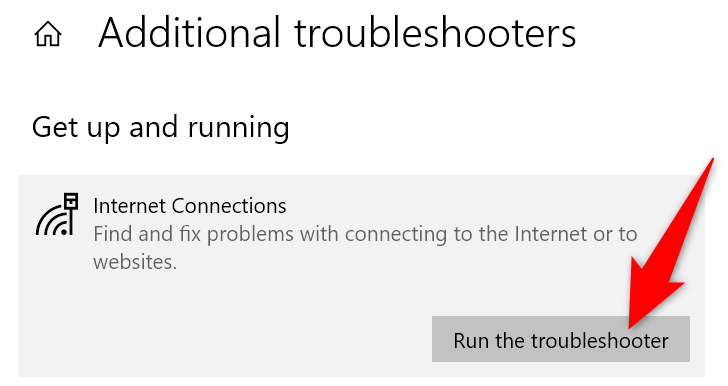
Use the Internet Connections Troubleshooter
If you still can’t access your sites and Chrome keeps displaying the “Server IP Address Could Not Be Found” error, seek help from your PC’s built-in Internet Connections troubleshooter. This tool runs an error check for your connections and then offers you help to fix issues.
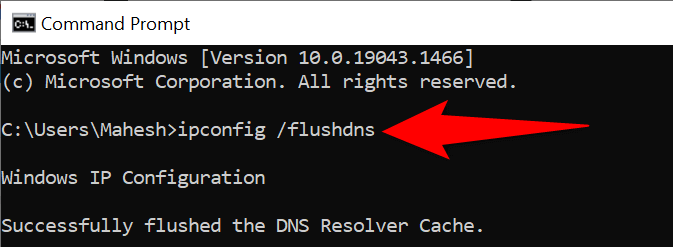
Clear the DNS Cache
It’s worth clearing your PC’s DNS cache to resolve any issues with the cache’s problematic files. This doesn’t change how your sites load and your internet sessions aren’t affected. Removing the DNS cache is as easy as running a command on your computer. On Windows: On macOS:
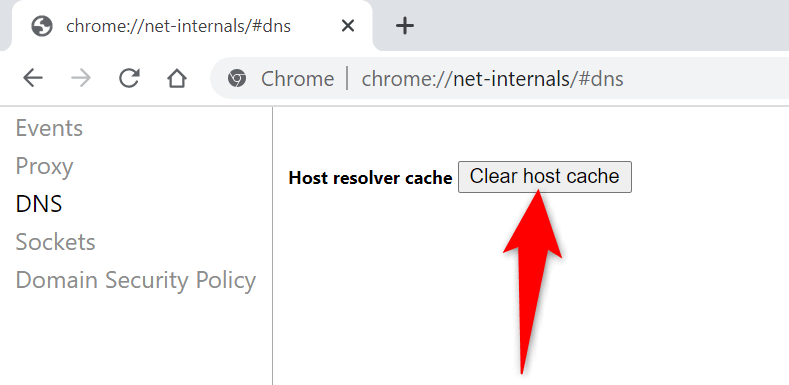
Clear Chrome Host Cache
Chrome stores its own DNS cache, and you should also clear this cache to potentially resolve the “Server IP Address Could Not Be Found” problem. Again, removing this cache is as easy as selecting a button.
Enable Dynamic IP Address on Your Windows PC
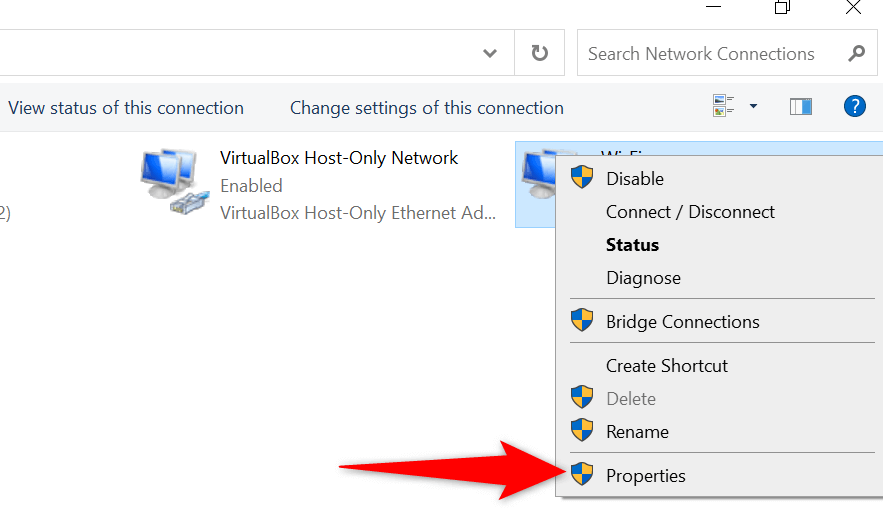
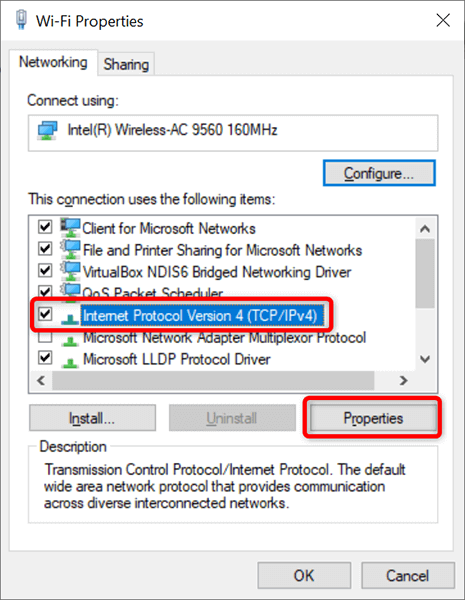
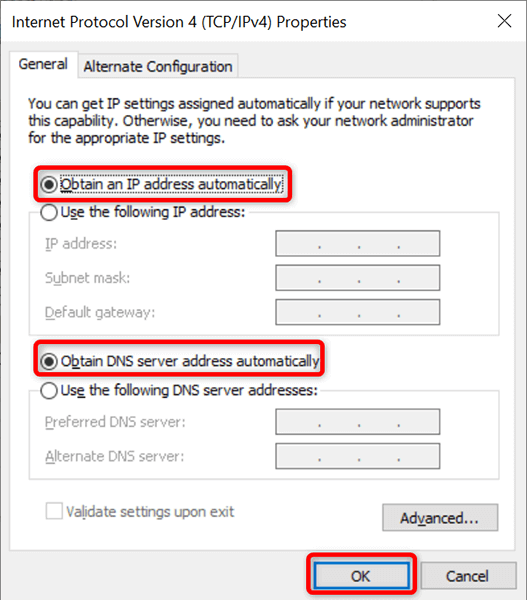
An incorrectly specified IP address can also cause Chrome to display the “Server IP Address Could Not Be Found” error. This is sometimes the case if you use a manual IP address with your PC. Luckily, you can quickly switch to DHCP and get a unique and automatic IP address for your computer. Before you do this, know that your configuration that explicitly uses your static IP address (such as your game server) will stop functioning. You’ll have to reconfigure that to work with your computer. Later, you can go back to an unused static IP on your network if you want. On Windows: On macOS:
Update Your Network Adapter Driver
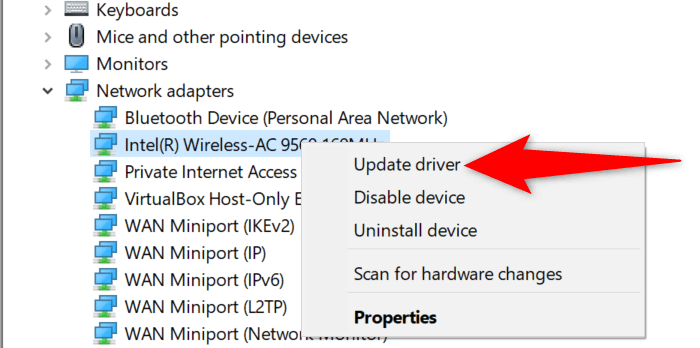
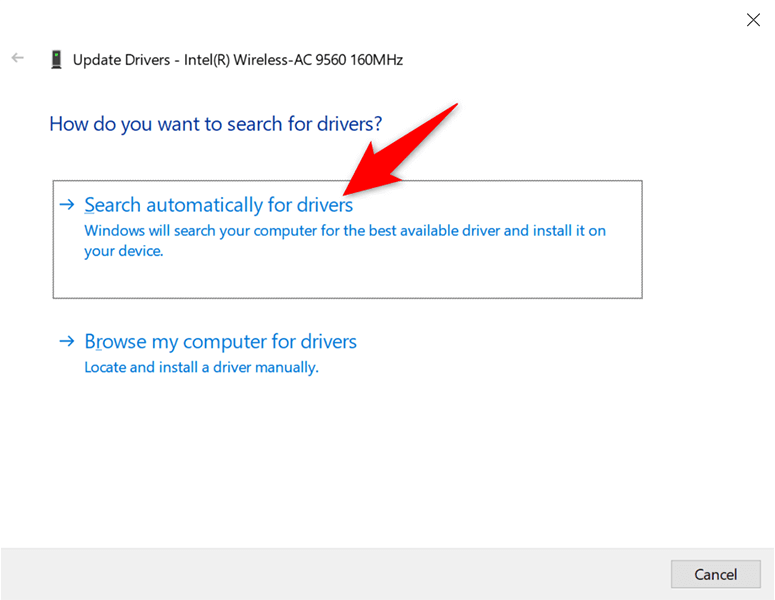
Like with all other devices, keeping your network adapter’s drivers up to date is important. This helps fix network issues on your machine, including the ones in Chrome, and gives you optimum network performance. You can automatically find and install the latest drivers for your adapter on your Windows PC.
Seeing the “Server IP Address Could Not Be Found” Error? Don’t Panic
If Chrome ever displays this error on your PC, don’t panic and instead follow the methods in this guide to fix the problem. It’s easier to resolve that issue than you think, and you’ll be back on your sites in no time. We hope this guide helps you out.


