However, there are times when you may wish to disable Secure Boot. It’s easy to do on most computers.
What Exactly Is Secure Boot on Windows 10?
Secure Boot is a feature on your Windows 10 PC that prevents your computer from booting with non-trusted devices. These devices are the ones that Microsoft hasn’t yet approved and digitally signed. For example, if you create a bootable Linux drive, that drive isn’t signed by Microsoft. Secure Boot will prevent your computer from booting that drive, hence keeping your PC safe and secure.
Why Disable Secure Boot on Windows 10
You would need to disable Secure Boot if you want to boot your computer from non-trusted devices. For example, if you wish to install Linux on your PC, and you need to boot from a bootable Linux drive, you’ll need to disable Secure Boot first. Other reasons for disabling Secure Boot include the need to install certain graphics cards or other hardware devices.
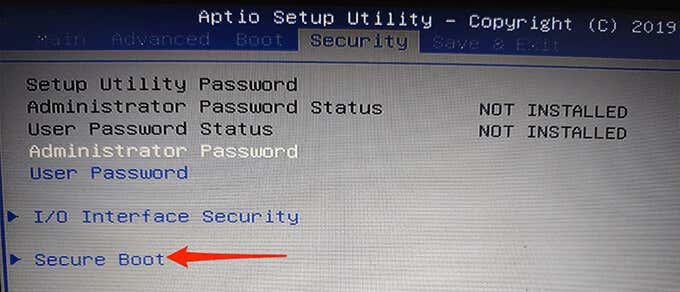
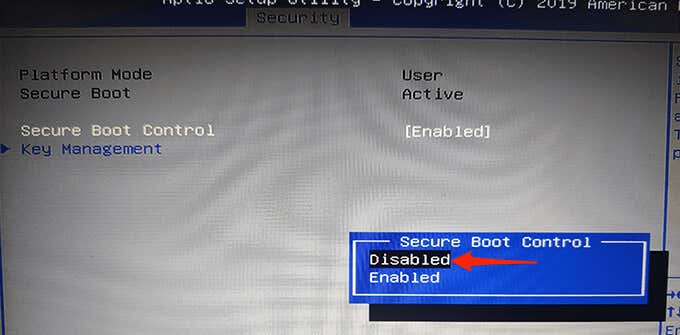
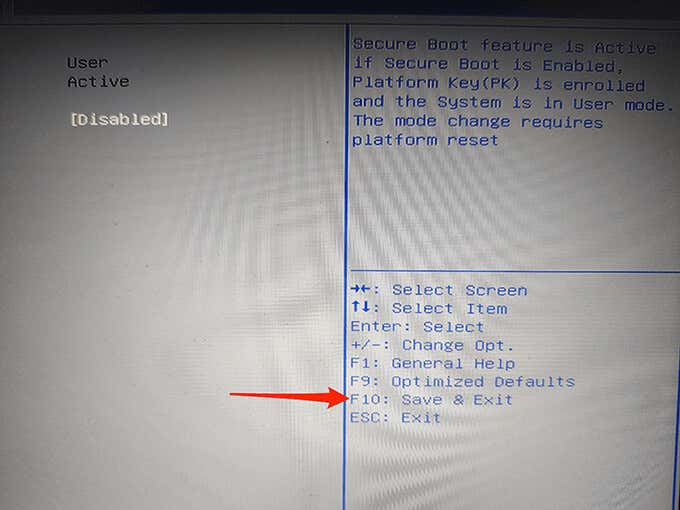
How to Disable Secure Boot on Windows 10
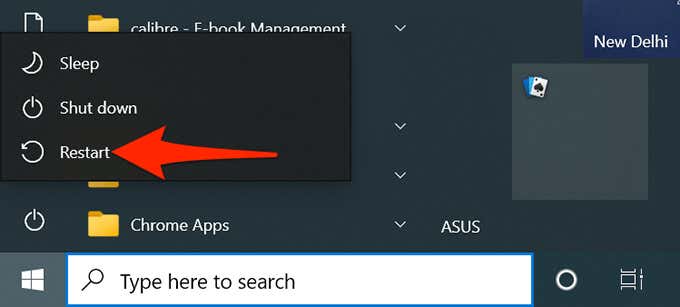
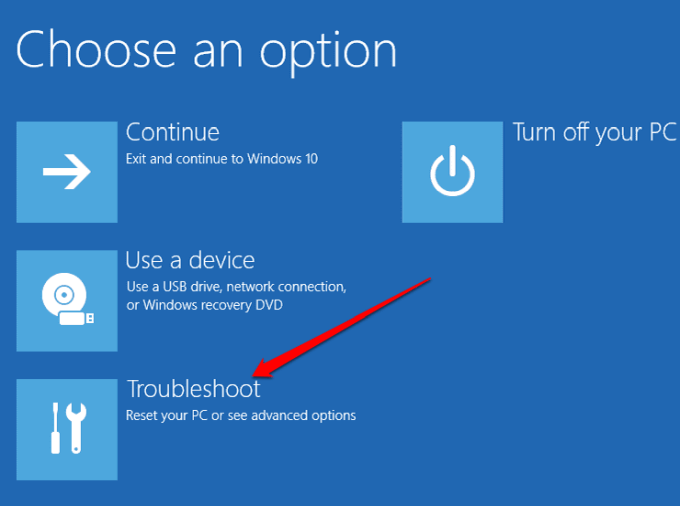
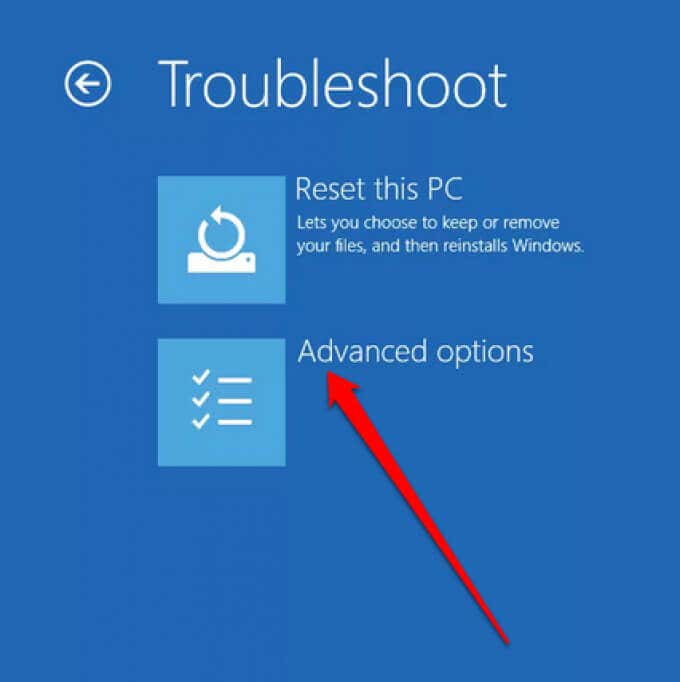
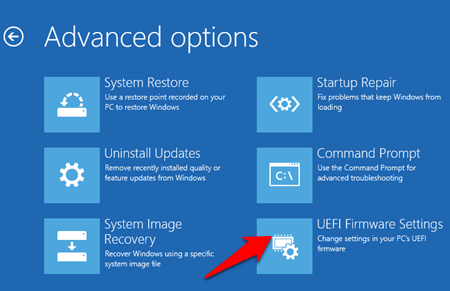
On Windows 10, you can disable Secure Boot from the UEFI firmware settings menu (BIOS). Before you turn this feature off, know that re-activating it might require you to reset your PC. With that said, let’s start the Secure Boot disable process: And that’s all there is to it. Secure Boot should now be disabled, and you can proceed to boot your PC from various bootable drives.
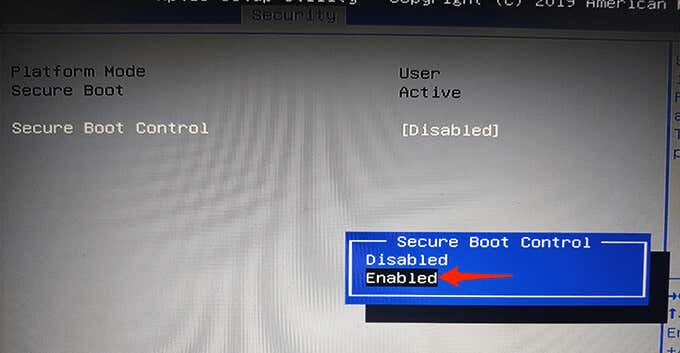
How to Enable Secure Boot on Windows 10
If you’ve finished your tasks and you want to re-enable Secure Boot, visit the same BIOS screen to turn the feature off. A few things to know before you attempt to re-enable Secure Boot:
If you have installed any graphics cards, hardware devices, or operating systems that are incompatible with Secure Boot, remove them before disabling Secure Boot.If Secure boot doesn’t reactivate for some reason, follow the troubleshooting procedure below.
To re-enable Secure Boot: Secure Boot should now be enabled.
What to Do When Secure Boot Won’t Turn On?
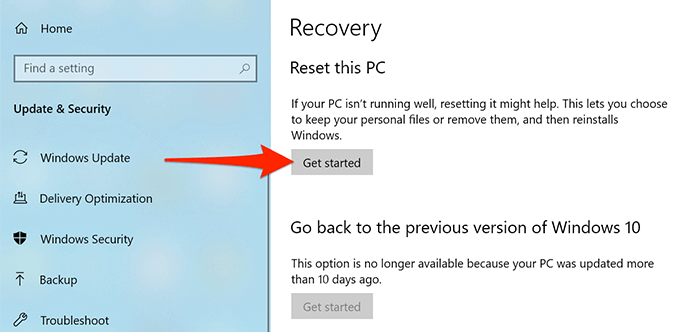
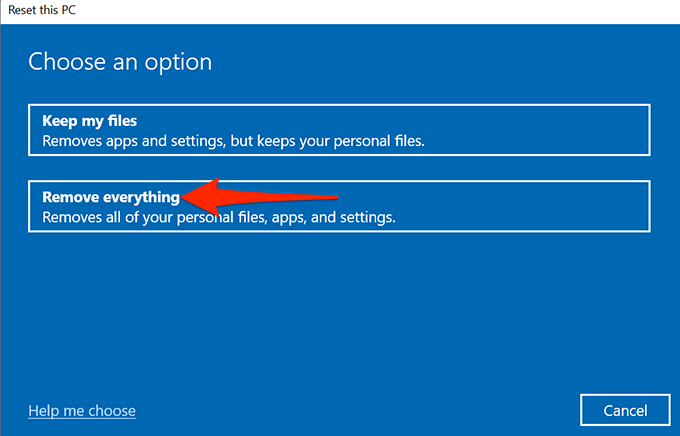
If Secure Boot refuses to turn back on despite removing the incompatible items from your PC, you might need to reset your PC. Resetting your PC will remove all your files as well as any custom settings. If you wish to keep certain files, back them up to an external drive or cloud. Then, follow these steps to reset your PC: Once your PC is reset, follow the procedure above to reactivate Secure Boot on your PC. We hope this guide helped you disable Secure Boot on your Windows 10 PC. Let us know what made you turn this feature off in the comments below.
![]()