In the end, the ribbon won the war and seems to be here to stay. Luckily, even if you’re not a fan, you can actually customize the Microsoft Office ribbon to better fit your workflow and needs.
Which Versions We’re Using
We’re using Office 365 as part of Microsoft 365. This means that the version these instructions are based on are for the latest version of Office at the time of writing. There should be few (if any) differences in how ribbon customization works, since all versions of Office are now essentially unified. There is however one major exception to this. The Office Live version of the service does not offer ribbon customization or, indeed, any ribbon at all. Like Google’s Docs, Sheets and Slides web applications, Office Live is a very cut-down version of the desktop apps. So the instructions and information below apply to current desktop versions of Microsoft Office only.
How Ribbons Work In General
Ribbons are meant to organize software functions by their general type. So functions that are usually used in conjunction with each other all share the same ribbon. In an application like Microsoft Word you’ll see a ribbon for design, layout, academic referencing and so on. By default Microsoft has done a great job of providing ribbons and ribbon functions that will satisfy most people. If you’re only doing basic spreadsheets or writing the occasional essay, there’s little reason to fix what’s not broken. If you’re doing the same, highly-specific sets of tasks on a daily basis however, you can speed up your workflow by tuning exactly which Microsoft Office ribbons are at your fingertips. Ribbons are further subdivided into groups of related commands. For example, the Home ribbon has a group named “Font”. This has the commands that relate to font formatting all in one place. Customization of the Microsoft Office ribbon therefore takes two main forms:
Adding and removing entire ribbons.Customizing the groups and commands that appear on a given ribbon.
We’re going to show you how to do both in Microsoft Office with ease, starting with how to add or remove entire ribbons.
How To Add Or Remove Entire Ribbon Tabs In Microsoft Office
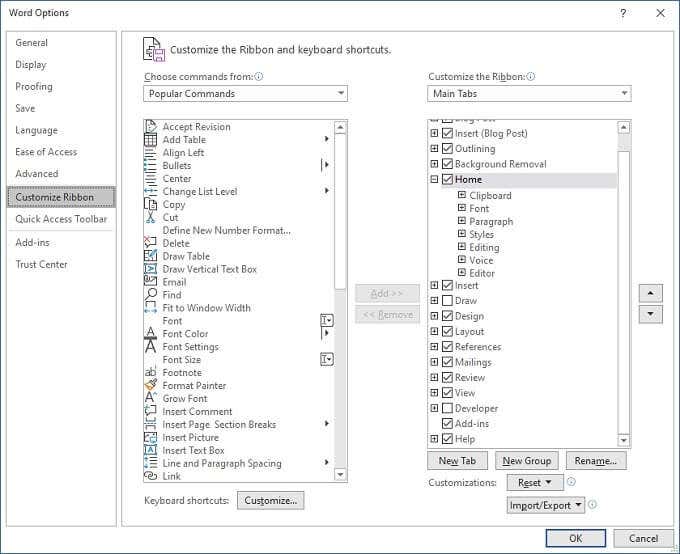
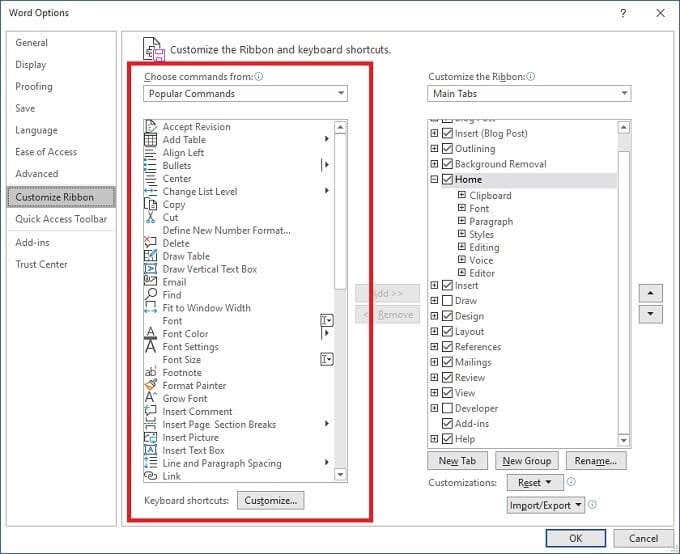
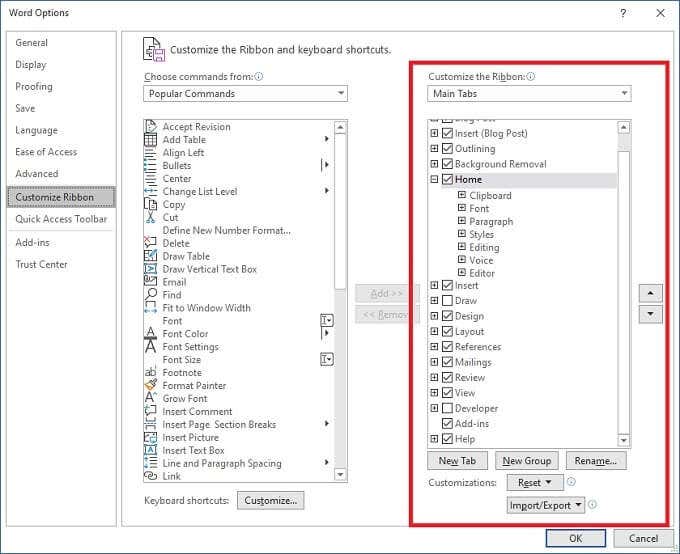
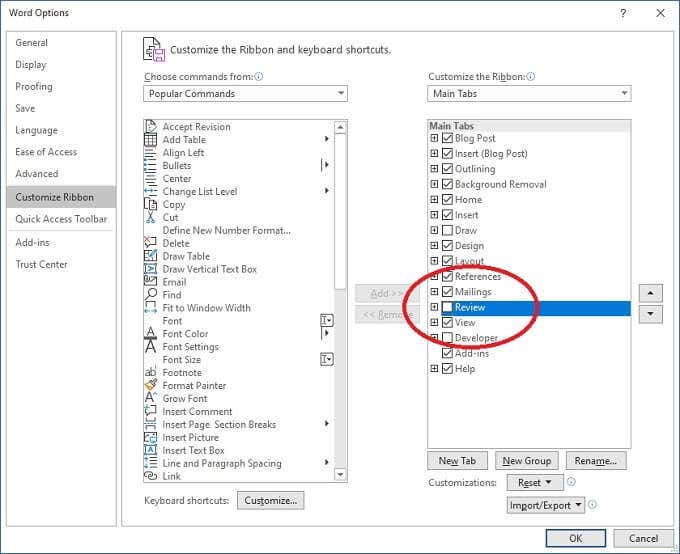
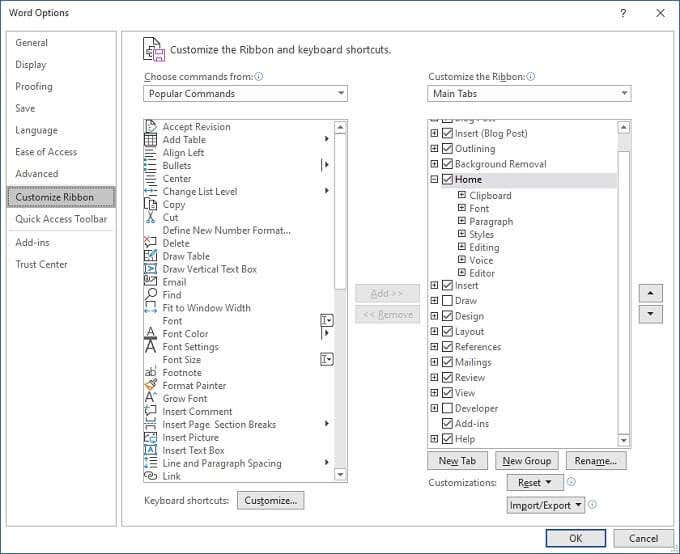
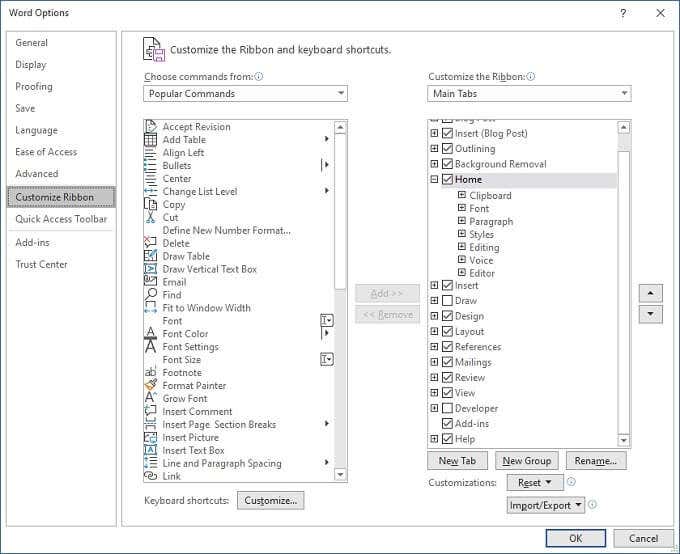
By default, Office does not put all of the ribbons that are in each application on your screen. There are actually entire ribbon tabs you might not know about that are just a few clicks away. To access the ribbon customization interface, all you have to do is right-click on any blank part of the ribbon then select Customize the Ribbon. You’ll see this window: Here you’ll see two columns. On the left, we have the commands that can be added to ribbon tabs and groups. These aren’t relevant right now, so let’s turn our attention to the right column under Customize the Ribbon. The dropdown below the name of this column can be used to see all the tabs, only main tabs or just tool tabs. For now, let’s just leave it on Main Tabs. As you can see, there’s an entry for each of the tabs you can see on the main screen of the Office app you’re using. Here we’re using Word, so a good example is the Review tab. If you uncheck the box to the left of the entry and then select OK, the review ribbon will disappear from Word’s main window. Go ahead and check or uncheck whichever boxes you want to. Then select OK when done and your app will only have the tabs you actually need.
How To Customize Individual Ribbon Tabs
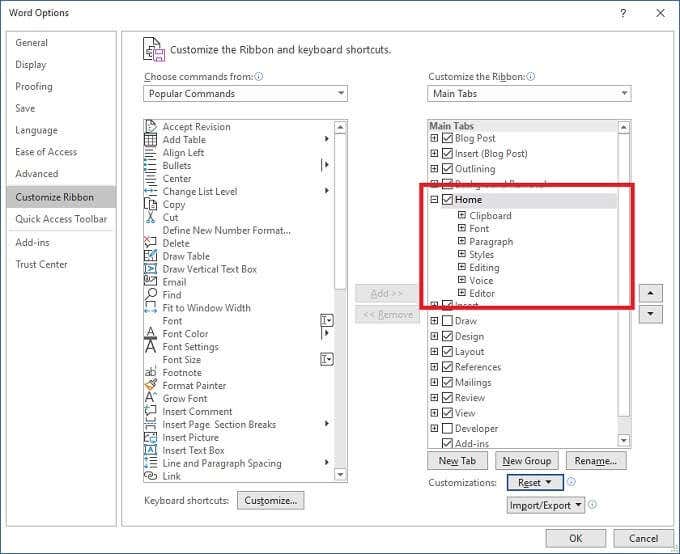
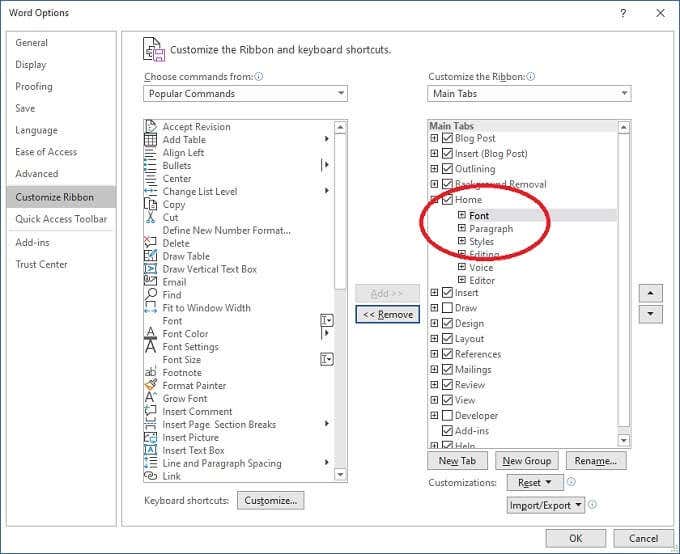
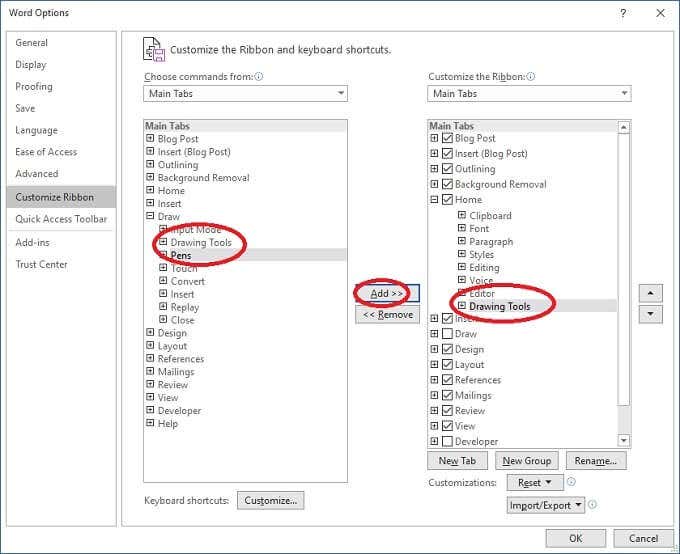
Now that you know how to remove tabs, it’s time to dig into the contents of each individual tab. First, right-click on any blank part of the ribbon then select Customize the Ribbon. Now, let’s choose a tab to customize. In this case that tab will be Home. Select the small plus to the left of Home. That will expand the list of groups within that tab. Now select a group. In this case we’re selecting Clipboard. Once selected, select the Remove button between the two columns. Clipboard will be removed from the Home tab. You can also add groups to tabs. First make sure the Choose commands from dropdown is set to Main Tabs. This is optional, but it does make it easier to figure out which groups and commands belong where. Let’s expand the Draw tab in the left-hand column. Select Drawing Tools then select Add. The Drawing Tools has now been added to the Home Tab. It’s possible to add individual commands as well, but these will have to be added to custom groups, so let’s see how those are created next.
Adding Custom Tabs & Groups
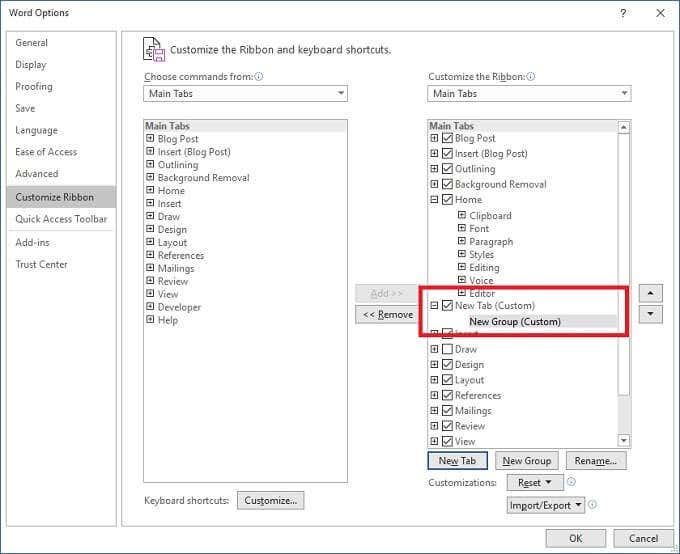
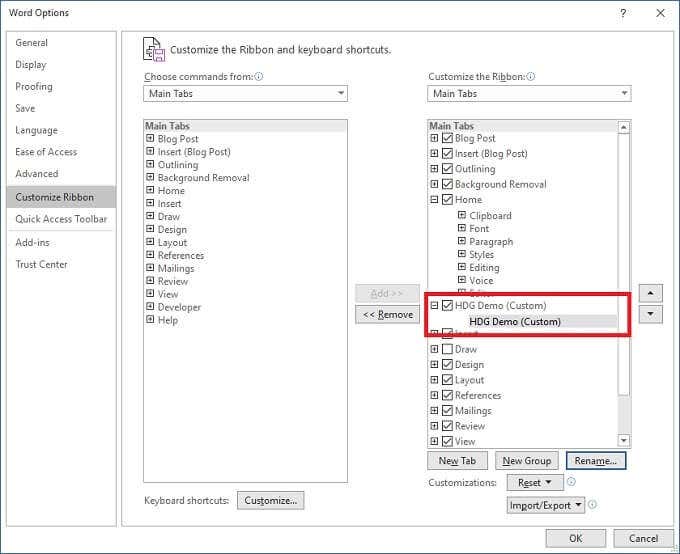
The last basic customization we’re going to do is the creation of a custom tab and groups. Go back to the Customize Ribbon Window. Now select New Tab. You’ll see a new tab appear with one new group under it. Select Rename to give your tab and group a custom name. Now you can use the instructions in the above sections to add groups to this tab. Of course you can also add custom groups to existing tabs as well. You can also add individual commands to your custom groups from the left column of listed commands. In this way you’ll build a completely custom interface for your Office app of choice.
Importing & Exporting Ribbon Customizations
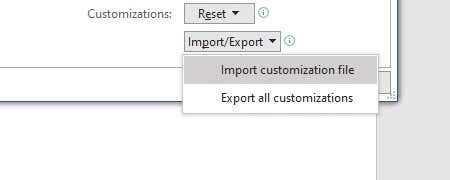
It would be pretty bad luck if you spent a long time perfectly fine-tuning your ribbon only to lose those settings. Whether it’s hard drive failure, owning more than one computer or buying a new one, you can export and import your customizations with ease. On the Customize the Ribbon window, select the Import/Export dropdown and either save your current customization or load a previously saved one. It’s as easy as that.
Resetting Your Customizations
It’s awesome that you can change just about every aspect of the Office ribbon, but it’s also a little too easy to completely mess things up. The good news is that getting your default customizations back is easy. If you had the foresight to save your configuration, then you can simply reload that customization file. If, on the other hand, you just want to go back to the way things were out of the box, select the reset dropdown in the customization window. Then either choose to reset only the selected tab or all of them. Now you know all the basics about Microsoft Office ribbon customization. Go forth and make it your own.
