Work your way through the list of fixes and suggestions below, and you should be able to fix slow download speeds in Chrome.
1. Pause/Resume Download
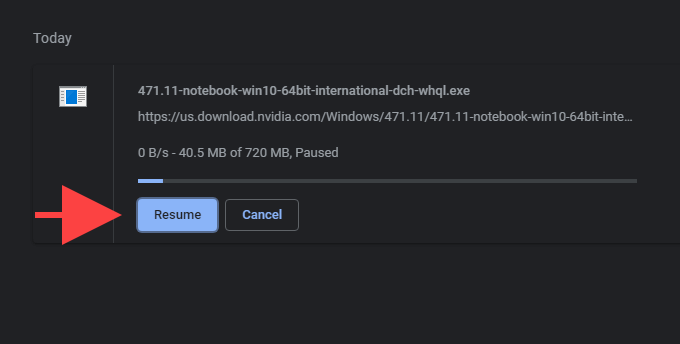
If you notice an unusually slow download in Chrome, pausing and resuming a download can sometimes prompt the browser into downloading it faster. To do that, press Ctrl + J to get to Chrome’s Downloads screen. Then, select Pause and wait for a few seconds before selecting Resume. Alternatively, choose Cancel and then Retry to re-download the file from scratch.
2. Check Download Speed
You should also check the download speed of your internet connection. You can use an online speed checking tool such as SpeedTest.net or TestMy.net for that. If you notice an unusually low download speed, soft-reset your router and see if that helps.
3. Pause Other Downloads
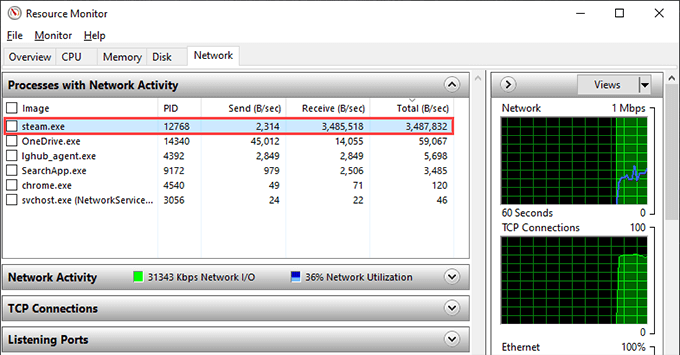
If you have any other applications that eat up large amounts of bandwidth, pausing them can help improve download speeds in Chrome. You can use the Resource Monitor on your PC to figure out network-intensive apps and services. To bring it up, right-click the taskbar and select Task Manager. Then, select More details, switch to the Performance tab, and choose Resource Monitor. You should find a list of apps under the Network tab. If you have other devices connected to the same network, you should pause download activities in them as well.
4. Disable VPN (Virtual Private Network)
If you use a VPN, you end up trading network performance for privacy. Even top-notch VPN service providers impact your internet speed. Try switching off your VPN and check if that makes Chrome perform downloads faster.
5. Update Chrome
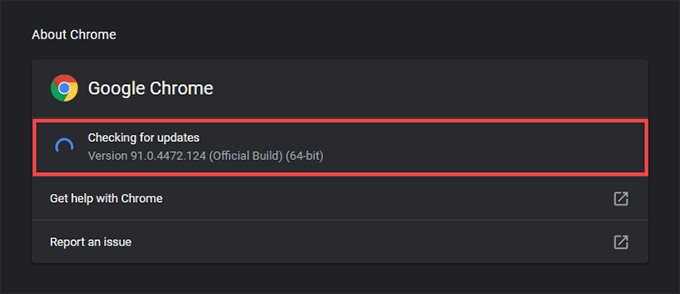
It’s a good idea to check if Google Chrome is up-to-date. That should help fix any bugs or glitches preventing Chrome from working optimally. The browser does install new updates on its own eventually, but you can open the Chrome menu, point to Help, and select About Google Chrome to apply them even faster.
6. Disable Extensions
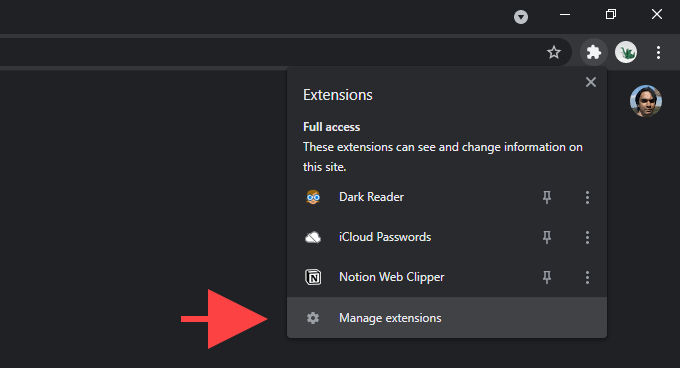
Chrome extensions can create conflicts that result in slow file downloads. Try disabling them. To do that, select the Extensions icon to the top-right of the Chrome window and select Manage Extensions. Follow by turning off the switches next to each active extension. If that helped improve the download speed, reactivate the extensions one by one until you figure out the one causing the issues.
7. Use a Wired Connection
If you’re using a Wi-Fi connection, try moving your PC closer to the router. That should help improve signal quality and increase download speeds. Or, consider switching to a wired connection. That almost always results in faster downloads since Ethernet completely rules out issues caused by weak signals and wireless interference.
8. Flush DNS (Domain Name System) Cache
You should also flush the DNS cache. That could help Chrome re-identify the best servers to perform a download. You can do that using Windows PowerShell. Start by right-clicking the Start menu. Then, select Windows PowerShell (Admin), type in the following command, and select Enter: Clear-DnsClientCache If you prefer using the older Command Prompt console instead, run the following command instead: ipconfig /flushdns
9. Change DNS Servers
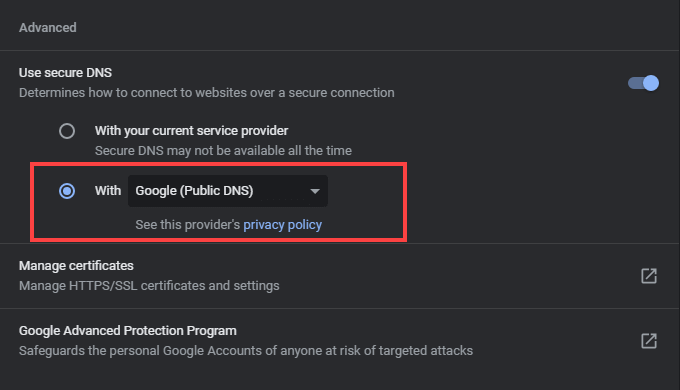
Your internet service provider’s DNS service can prevent Chrome from locating the fastest servers while performing file downloads. Instead, switching to a popular DNS service such as Google DNS, Cloudflare, or OpenDNS can help. To do that, open the Chrome menu and select Settings. Then, select Privacy & Security > Security. Follow that by selecting the radio button next to With and choose Google (Public DNS), Cloudflare (1.1.1.1), or OpenDNS on the pull-down menu next to it.
10. Clear Chrome Cookies and Cache
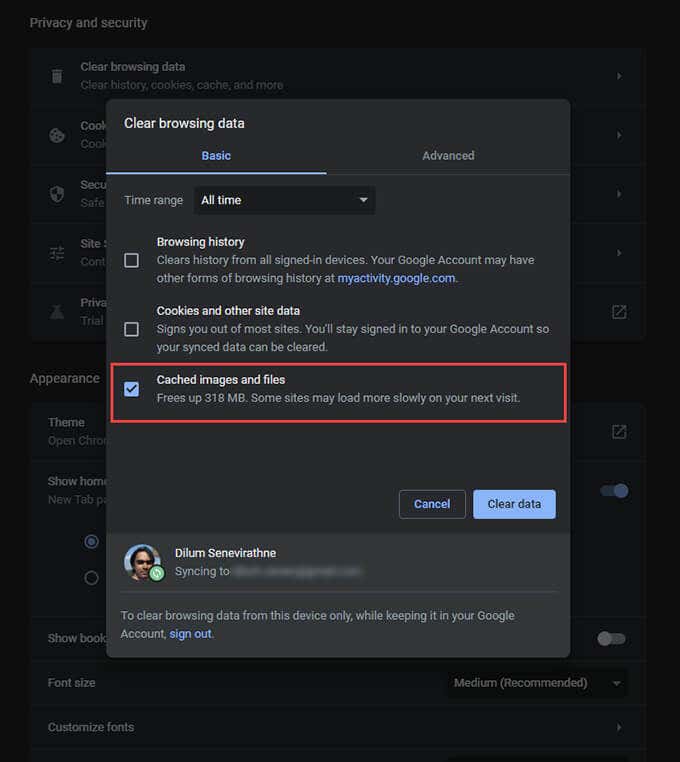
Obsolete Chrome cookies and an outdated browser cache can also prevent Chrome from working as usual. To clear them out, start by opening the Settings pane in Chrome. Then, select Privacy & Security > Clear browsing data and set Time range to All time. Follow that by checking the box next to Cookies and other site data and Cached images and files. Finally, select Clear data.
11. Check for Malware
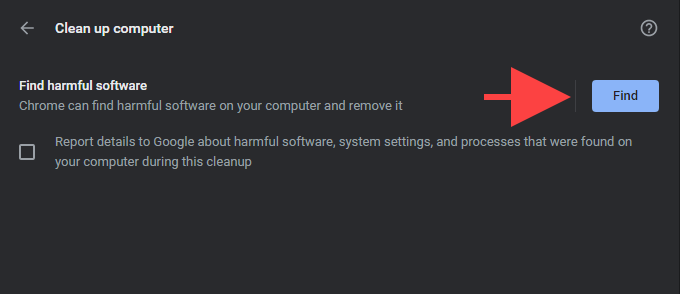
Malicious extensions and browser hijackers are another reason that results in poor Chrome download speeds. You can confirm if that’s the case by scanning the browser installation using its built-in malware scanner. Start by selecting Settings on the Chrome menu. Then, select Advanced > Reset and clean up. Follow by selecting Clean up computer > Find.
12. Reset Chrome
If download issues persist, try resetting Chrome. That reverts it to factory settings, but you won’t lose your bookmarks, history, or passwords. To perform a settings reset, open the Chrome menu, select Settings, and go to Advanced > Reset and clean up > Restore settings to their original defaults. Then, select Reset settings.
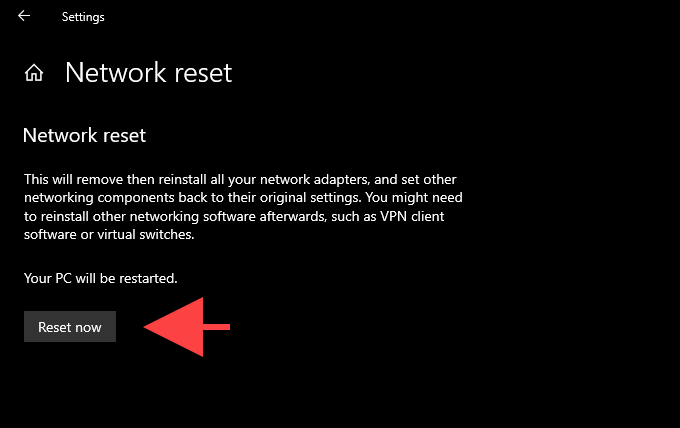
13. Reset Network Settings
If none of the fixes above helped, you might be dealing with an issue related to the network settings in the operating system. Hence, a network settings reset might help resolve that. To do that, go to Start > Settings > Network & Internet > Status and select Network reset > Reset now. For complete step-by-step instructions, check out this post about resetting the network settings in Windows.
Chrome Downloading in High Speed Again
The tips above should’ve definitely helped you fix the download issues in Chrome. However, if the problem persists, try removing and re-installing the browser. Or, switch to another browser for the time being. There are loads of lightweight alternatives that just might make a difference in download speeds.