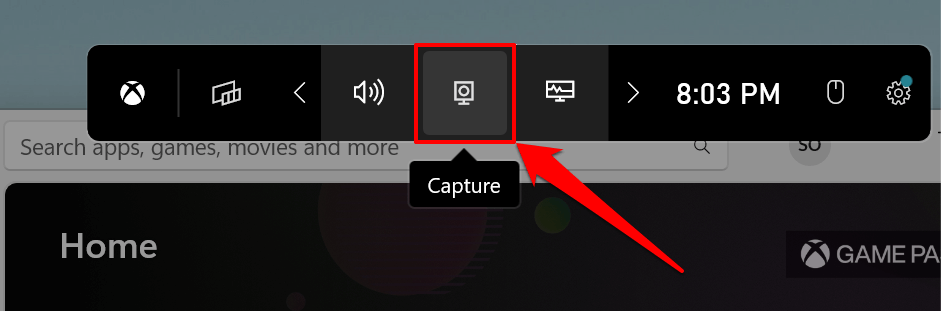
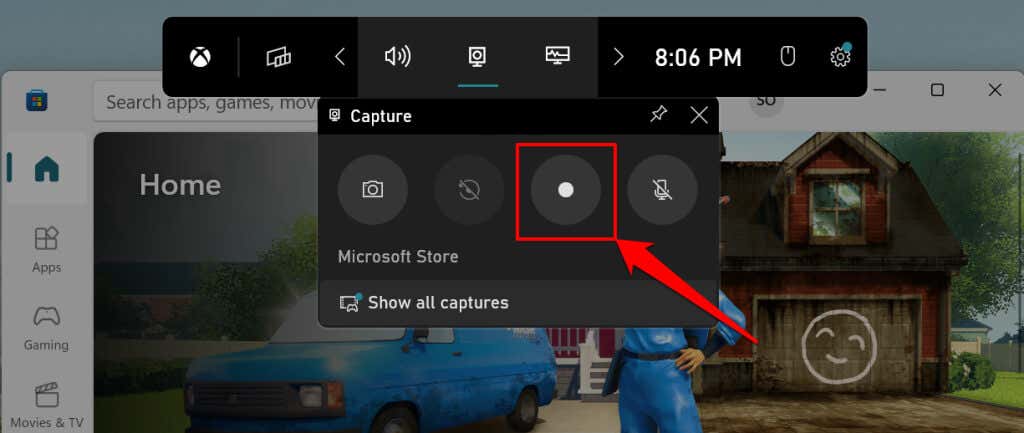
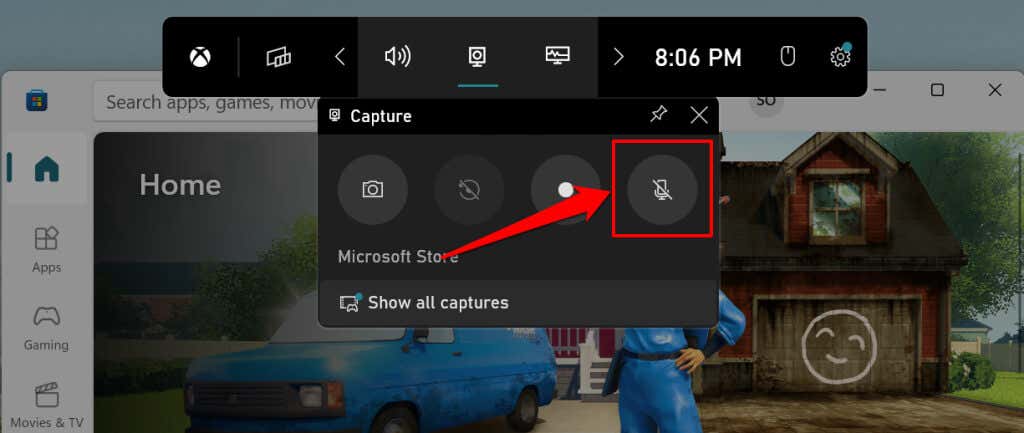
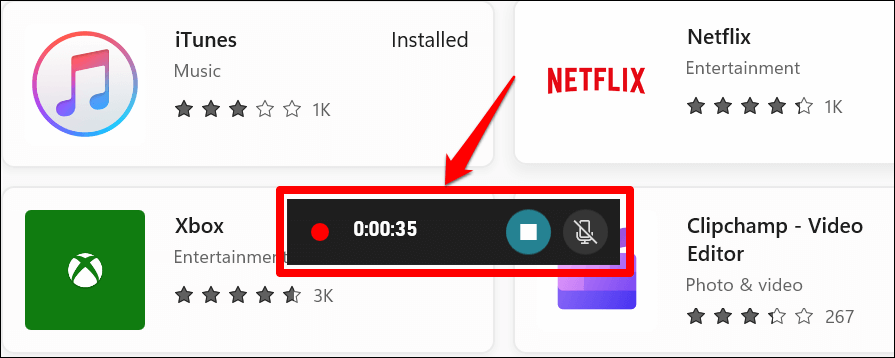
1. Record Screen Using Xbox Game Bar
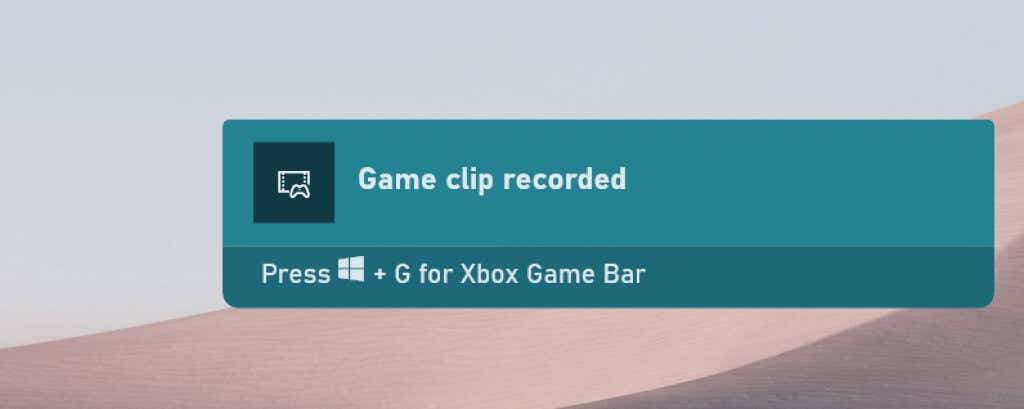
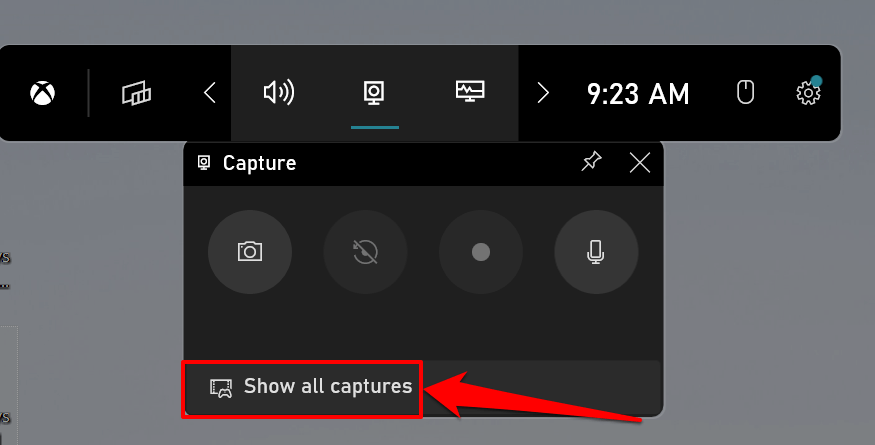
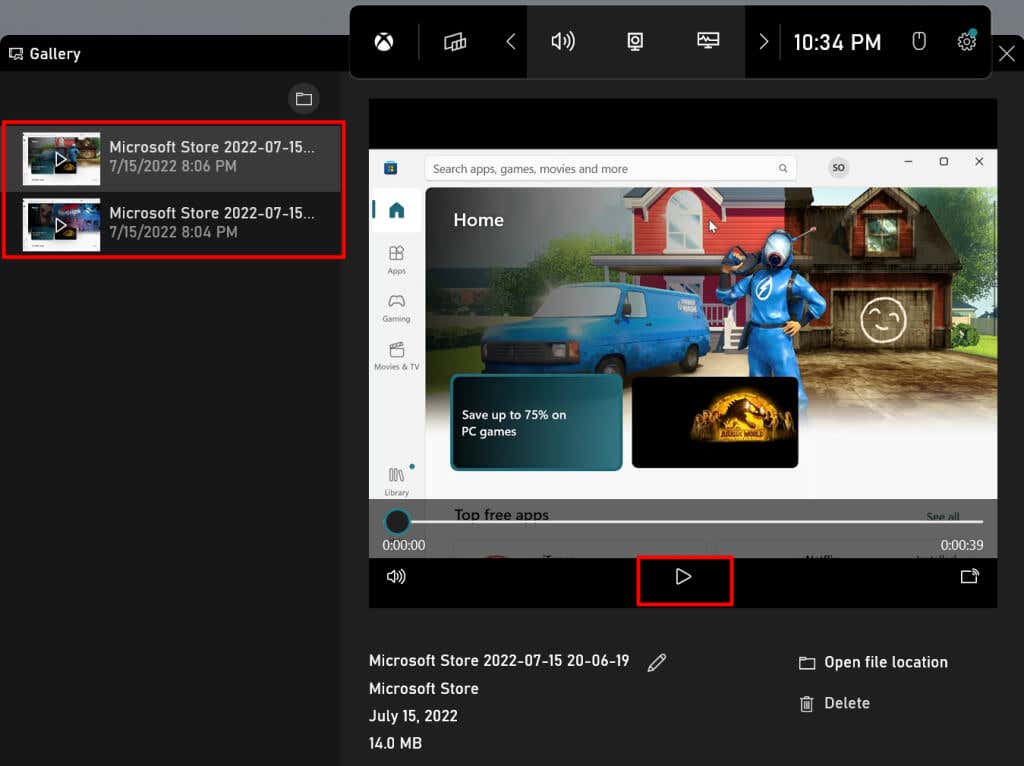
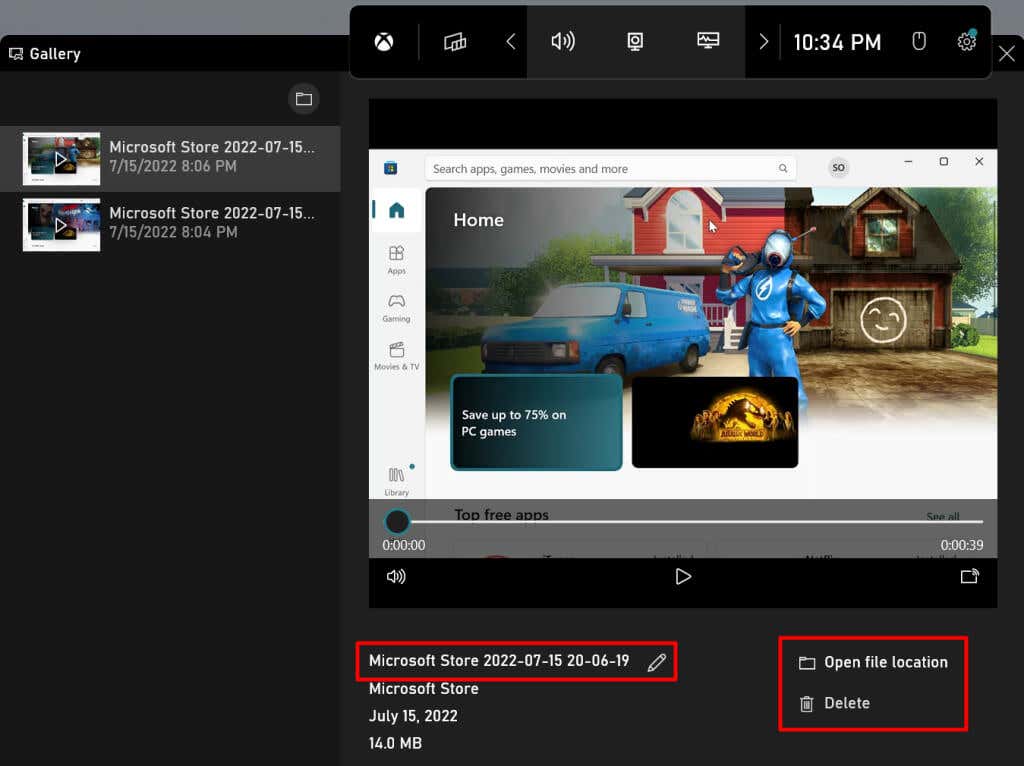
Computers running Windows 10 and Windows 11 have the Xbox Game Bar pre-installed. Open the app you want to record and follow the steps below. Note: The Xbox Game Bar cannot record your Desktop or File Explorer windows. The Xbox Game Bar records only on-screen visuals by default, but it can also record audio output. If the Microphone icon next to the Record button is crossed out, the tool won’t capture your device’s audio (output). Select the Microphone icon to enable the Xbox Game Bar microphone for audio capture. The Game Bar should display a floating “Capture Status” window when it starts recording. The window displays the (ongoing) recording length and options to end the recording and manage audio capture. The Xbox Game Bar should display a “Game clip recorded” notification on the right edge of your screen. Alternatively, open the Xbox Game Bar (Windows key + G), select the Widget Menu icon, and select Gallery. Xbox Game Bar’s screen recordings are saved in your PC’s Videos folder. Head to File Explorer > This PC > Videos and open the Captures folder. Quick Tip: Press Windows key + Alt + R in any app or window to start a screen recording session. This keyboard shortcut also works on Windows 10 computers.
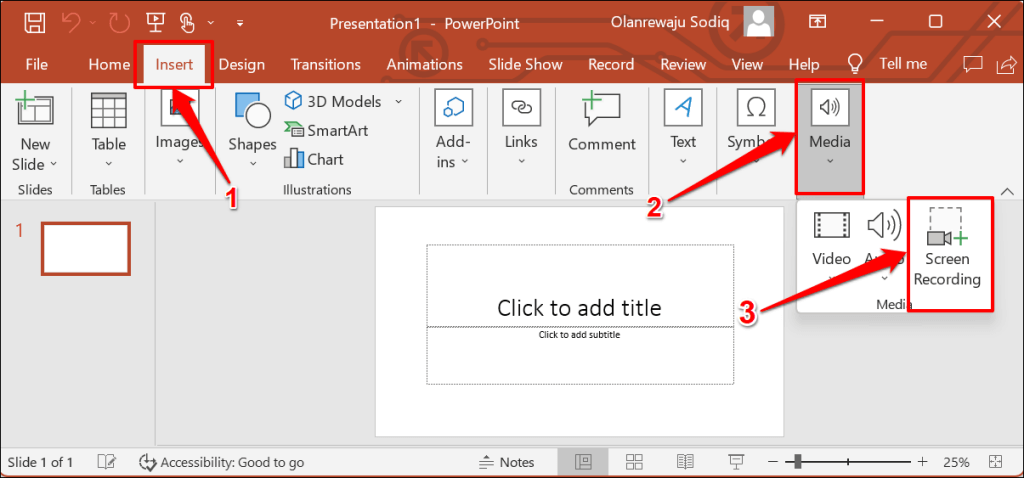
2. Record Screen Using Microsoft PowerPoint
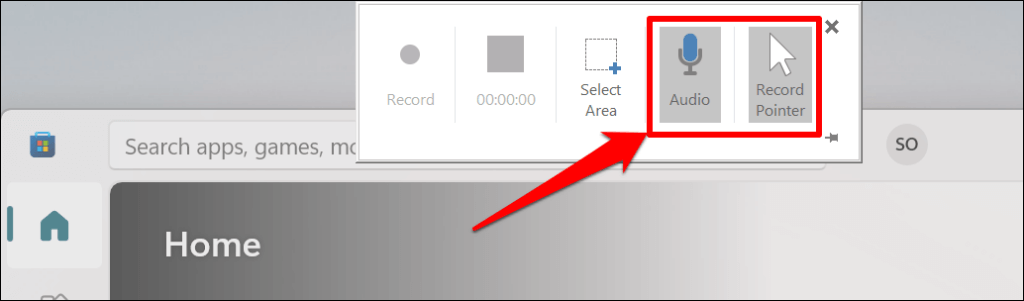
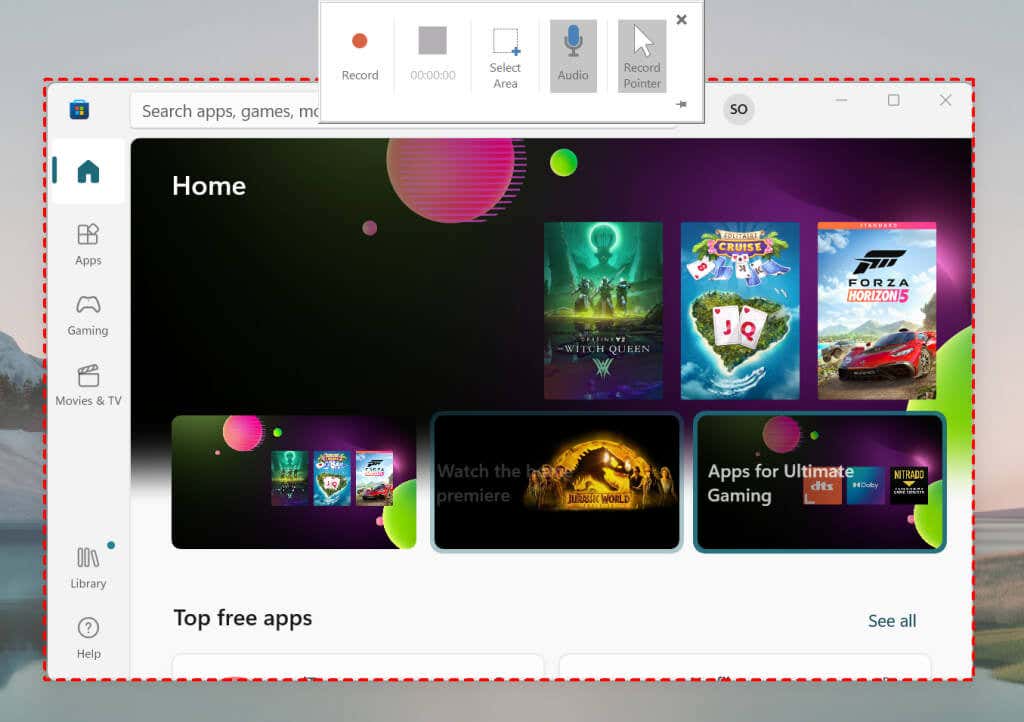
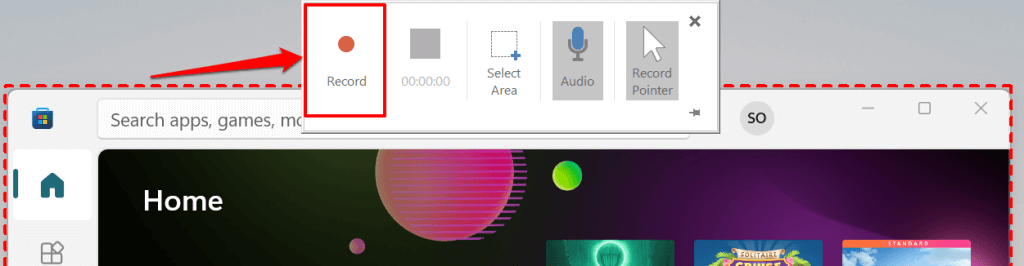
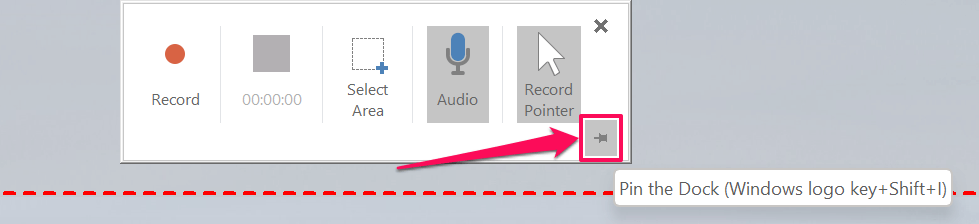
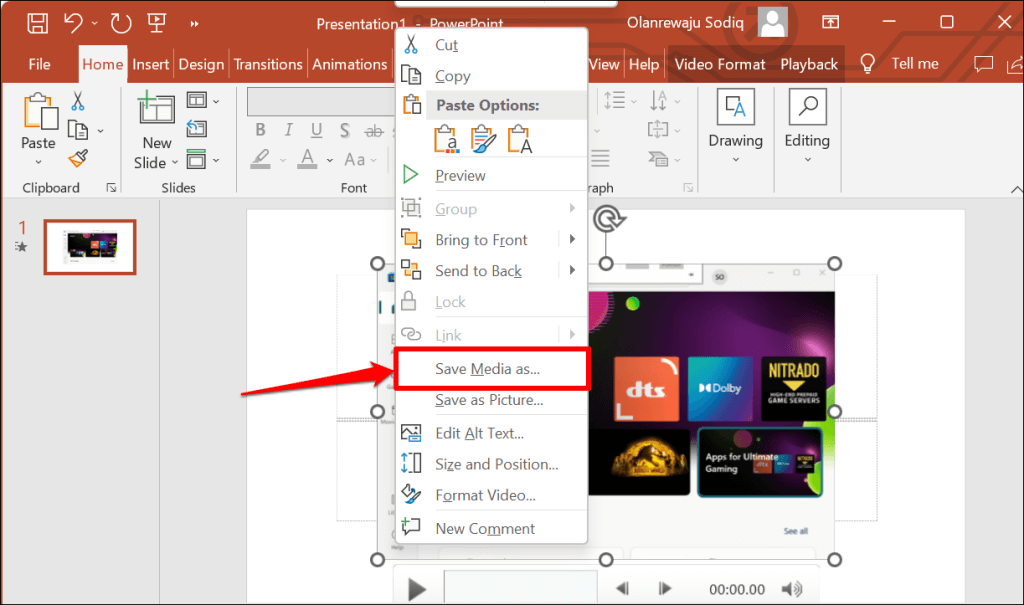
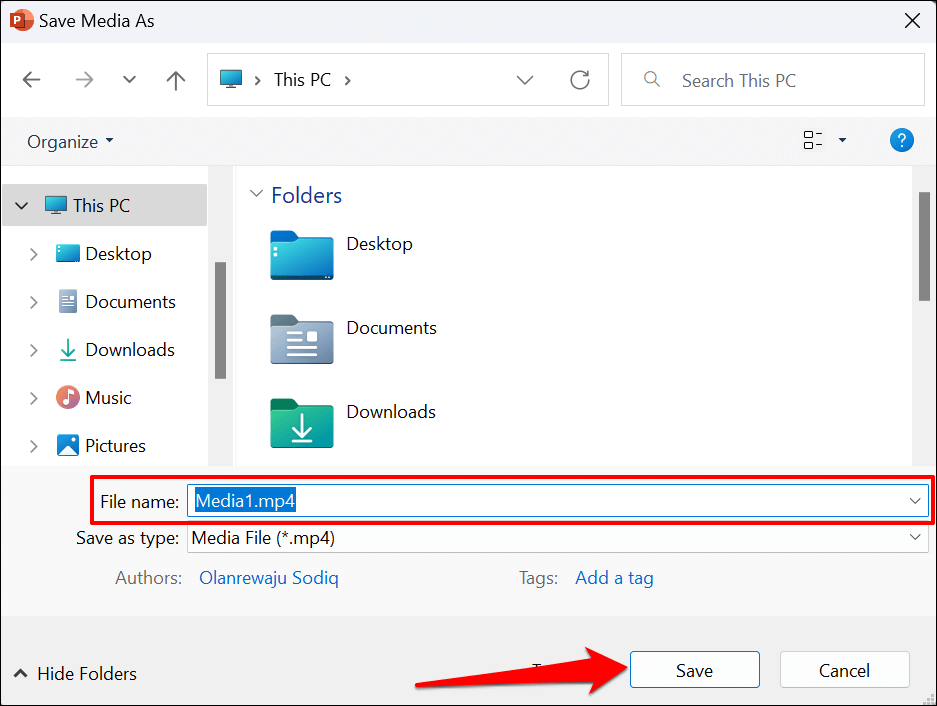
The Microsoft Powerpoint application has a built-in screen recording tool that works system-wide. The tool captures audio and visuals on all applications installed on your computer, not just within Powerpoint. You’ll find Powerpoint’s screen recording tool useful if Xbox Game Bar isn’t working on your computer. Or, if your PC’s video card doesn’t meet Xbox Game Bar’s hardware requirements. Follow the steps below to record your computer’s screen through Microsoft Powerpoint. Note that you cannot resize or remap the recording area. Click Select Area again on the Dock to map out a new recording area. Note: Powerpoint’s screen recording Dock will disappear when you start recording. Move your cursor to the top of the screen to bring back the Dock. Select the Pin icon in the bottom-right corner (or Windows key +Shift + I) to fix the Dock on the screen. Select the Stop button above the timer or press Windows key + Shift + Q to end the screen recording session. You can stop capturing your PC’s audio or cursor during screen recording. Select the Microphone icon on the Dock (or press Windows + Shift + U) to stop or resume audio capture. To stop capturing your PC’s cursor, deselect Record Pointer on the Dock or press the Windows key + Shift + O.
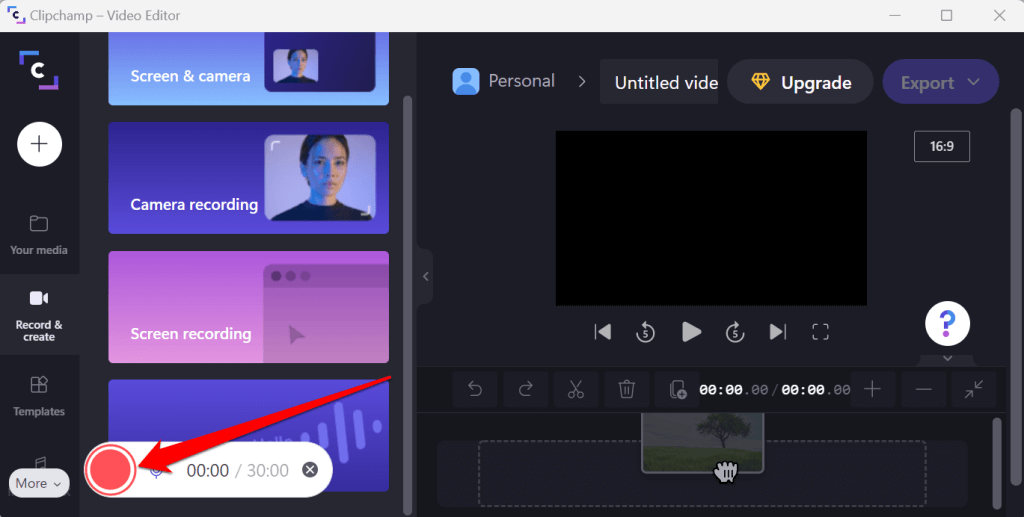
3. Record Screen Using Clipchamp
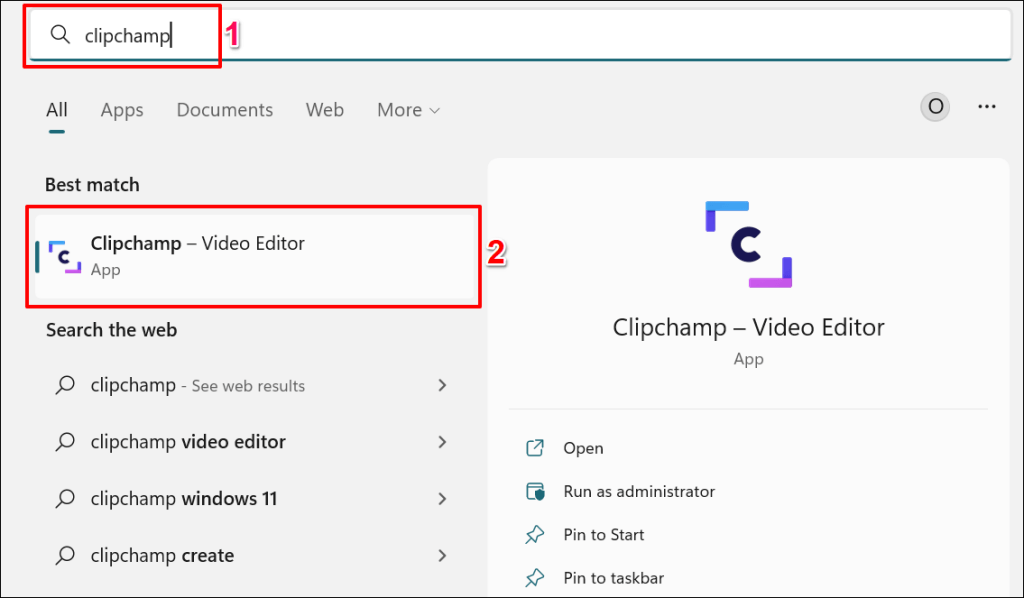
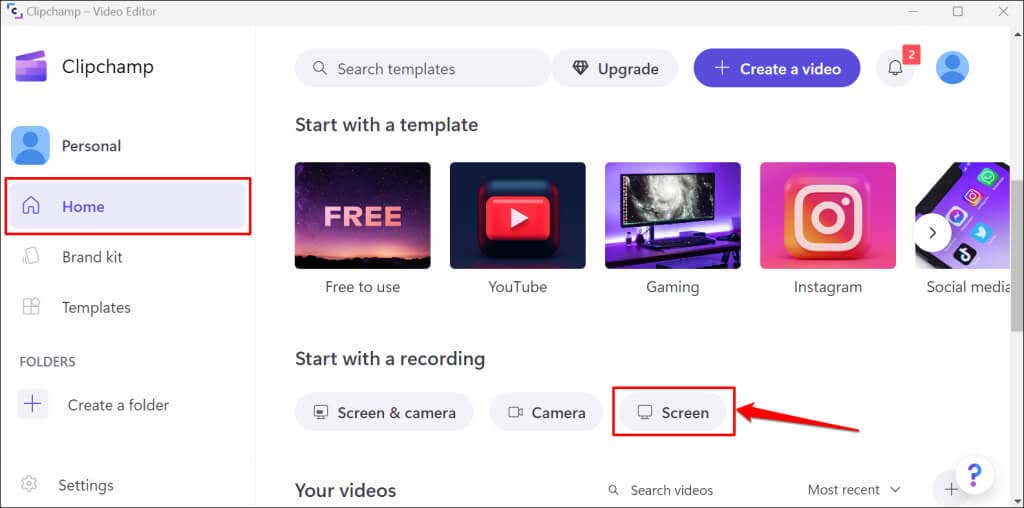
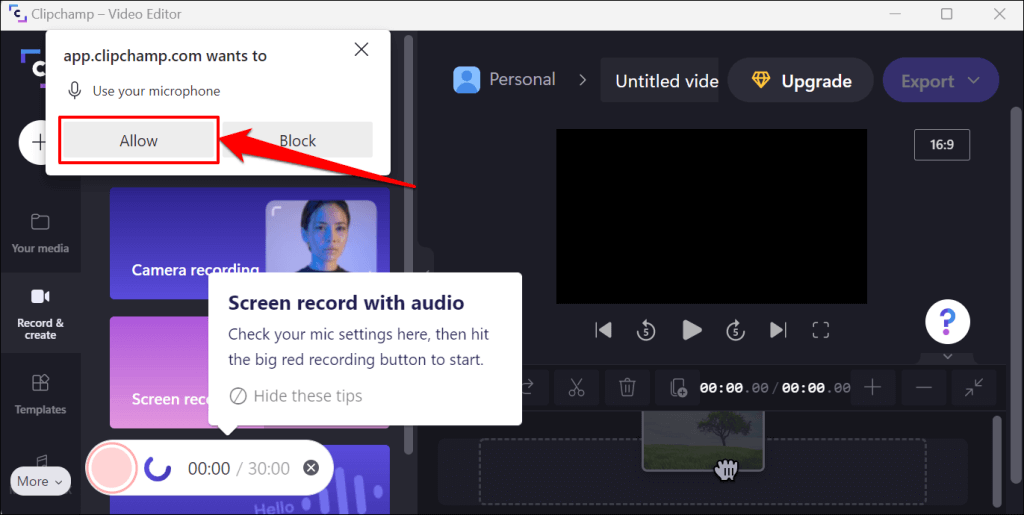
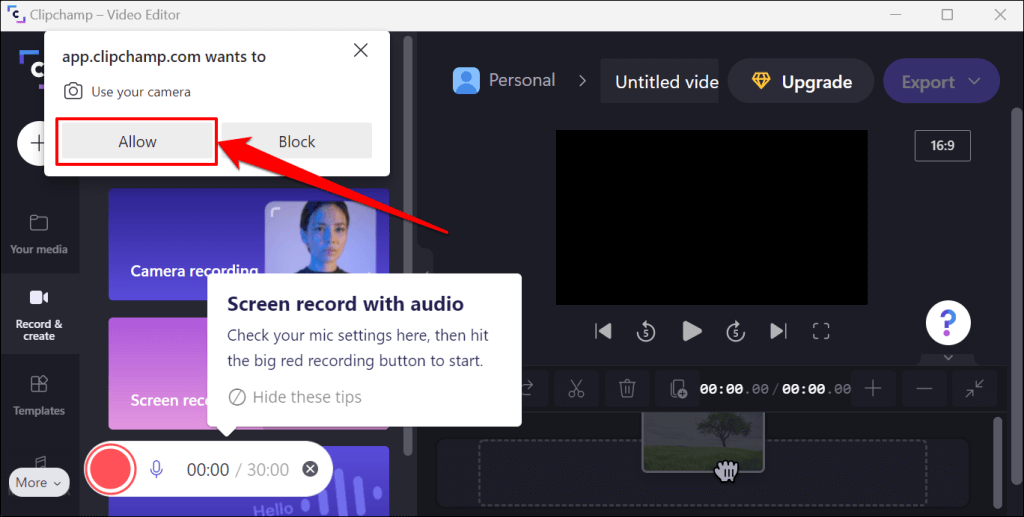
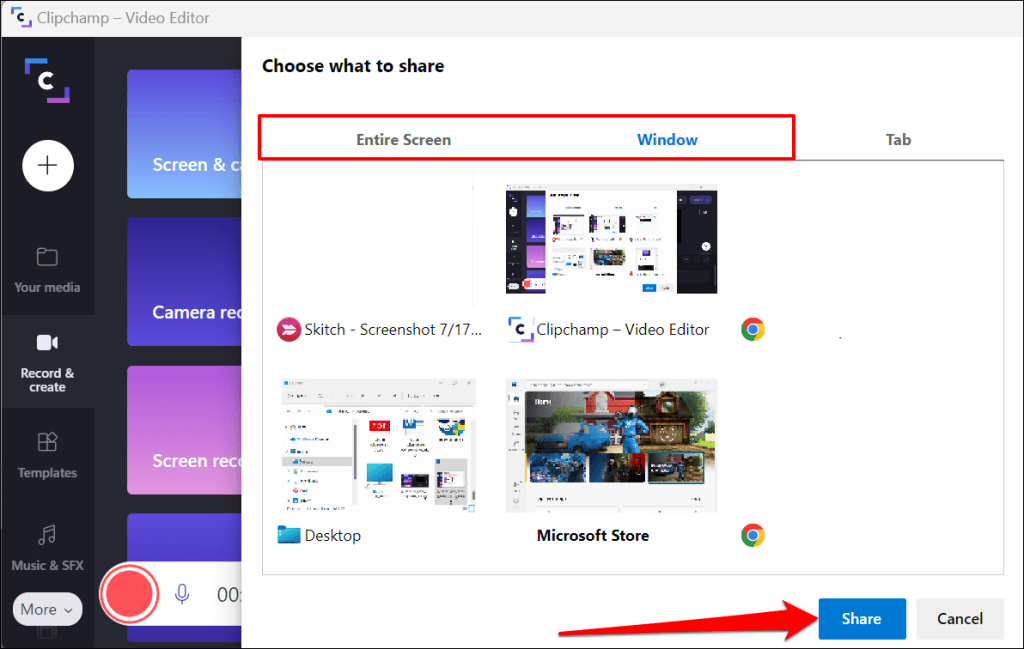
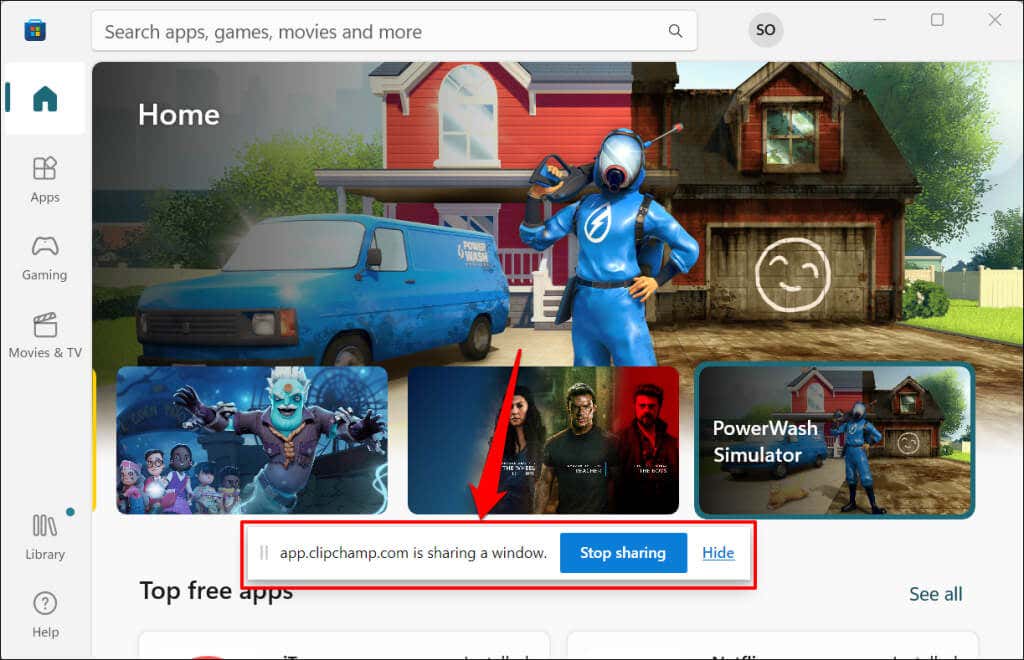
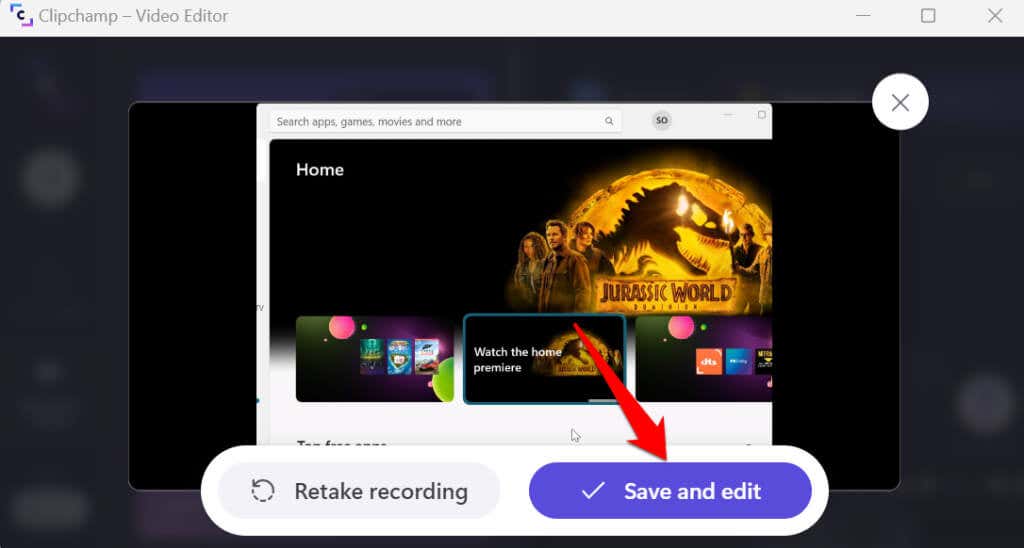
Clipchamp is a video editing software built into the Windows 11 operating system. The software has tools that allow you to record your PC’s screen, webcam and easy-to-use editing tools for video creation. Although Clipchamp has subscription plans, you can use many of its features for free. The free “Basic” plan lets you record your screen or webcam for up to 30 minutes in a single session. Follow the steps below to record your Windows 11 computer’s screen using Clipchamp. If it’s your first time using the app, you must grant it microphone and camera access. See steps #4 and #5. Unlike Powerpoint, Clipchamp doesn’t let you pause screen recordings. Again, you can only record your screen for 30 minutes at a time—unless you buy a Clipchamp subscription. You can install Clipchamp from the Microsoft Store if the app isn’t pre-install on your PC.
4. Use Third-Party Software
There are third-party apps with better screen recording features than Clipchamp, Microsoft Powerpoint, and the Xbox Game Bar combined. Good examples are OBS Studio, Radeon ReLive, Bandicam, Gecata, etc. Refer to our article on game recording and streaming software for more information about these apps and their features. The screen recording software is open-source, free, easy to use, and they don’t watermark your recordings.